Ten Cheap Upgrades to your Home Theater
We’ve all been there. We want to upgrade our home theaters but we can’t because our bank accounts are hovering just above the red. While much of the home theater game is powered by money, you don’t always have to spend a lot to make a big difference in your home theater. Let’s walk through some cheap upgrades that you can do to make your home theater even better!
Improve your Home Theater Picture Quality on the Cheap
The first thing people think about when improving their home theater is the picture. How can you make it better? Sure, those OLEDs have great black levels and incredible pictures, but they cost an arm and a leg. You could go for a projector, but then you are looking at screens and who knows what else. So, what are our go-to’s for cheap upgrades for the picture quality in your home theater?
Cheap Upgrade 1: Paint
Believe it or not, the color of your walls can have a big effect on how you perceive the image on your screen. While white (or light grey) is all the rage right now, they are highly reflective colors. The light comes off the screen, bounces off the walls, and hits your eye (or back on the screen). This lowers your perceived contrast and can make your picture look more washed out than it really is. Consider painting the walls a darker color. We like Sherwin Williams Grey Screen (link). It is a neutral color that will absorb more light than it reflects. If you click on the link, you get a number of different shades. Pick the darkest one that makes sense for your room. You could go black, but, honestly, that looks a little extreme.
Cheap Upgrade 2: Bias Lights

Paint can be expensive, we know that. To get the good stuff, you might be out a couple of hundred dollars for a room. But you know what isn’t expensive? LED lights. One of our favorite cheap upgrades for your home theater is to add bias lights to your display. These work with ALL displays from direct view to projection screens. All you need is enough lights to outline the back of your screen and a way to attach them. We like the BINZET LED light strips. They are cheap as chips (enough to outline a projection screen costs around $20), have a dimmer, and can be attached via included sticky strips. You can cut them to size and they are the proper color (6500k). For $20, if you don’t like them, take them off and use them in another room or on top of your cabinets. No problems!
Cheap Upgrade 3: Light Control
You may be noticing that not all of these “cheap” upgrades are free. Yes, they cost money. But what they aren’t is home theater gear. You may not convince your significant other to buy more speakers, but they may be more open to traditional purchases. Like curtains.
If there is light hitting your screen, your image will suffer. Blackout curtains are cheap and easy to hang. By installing some blackout curtains, you can suddenly control the light in your home theater. This allows your image to look better without much effort on your part!
Improve your Home Theater Sound on the Cheap
Taking the first steps into true home theater can be exciting. Your first pair of surround speakers. Your first subwoofer. Everything sounds so new and exciting. But, pretty soon, you start to hear the deficiencies. Can’t understand the vocals? Maybe the bass sounds a little boomy? People are complaining about the bass in other rooms? We can fix all of that!
Check out our 6 Living Room Audio Upgrade Tips for more suggestions!
Cheap Upgrade 4: Add a Thick Rug

Too often we see home theaters with hardwood or tile floors. We get it. The room you have is the room you have. But that hard surface between you and your center channel speaker provides a surface for which the sound to reflect. This can be detrimental to dialogue intelligibility. Getting a thick rug with a nice thick pad under it can make a huge difference. Alternatively, if you have a coffee table between you and your center speaker, consider moving it or covering it with a thick comforter. If you can understand what people are saying better, it might be time to get rid of that table and invest in a plush ottoman.
Cheap Upgrade 5: Move your Couch
Is your couch up against the back wall? Can you not understand what people are saying no matter how loud you turn up the volume? You may be experiencing a slap echo. A slap echo is when the sound bounces off the wall behind your head and reaches your ear a second time. Your brain doesn’t know which sound to pay the most attention to, so it tries to hear both. This doesn’t go very well and you can’t understand what people are saying.
To know if you have a slap echo, put a thick comforter behind your head. If you can now understand what people are saying better, you have a slap echo. For a cheap upgrade to the sound in your home theater, all you need to do is pull your couch off the wall. The farther the better. If you can’t for space or aesthetic reasons, consider adding some absorption behind your couch. You can DIY it, or there are reasonable offerings from places like GiK. Either way, it doesn’t take a bunch of cash for this upgrade to your home theater.
Cheap Upgrade 6: Proper Subwoofer Placement
Subwoofers operate differently from any other speaker in your home theater. While all other speakers depend on placement in your room for proper operation, your subwoofer pairs WITH the room to give you the bass. If the bass seems uneven, you probably have your sub in the wrong spot. Properly placing your subwoofer can be challenging because of space constraints or aesthetics. To get the best placement in your room, you are going to need to crawl.
The subwoofer crawl is a tried and true method of finding the best spot for your subwoofer in your theater. How? In short, you’ll need a bass sweep to play on repeat. Then you place your subwoofer on your couch. Yes, your couch. Basically at the “best” seat in the house (the one between the two front speakers and facing the center channel speaker). You then “crawl” around your room until you find the spot that has the most even volume throughout the bass sweep. This is the best place for your subwoofer and you should place it there. With some room correction, you now will experience better and more even bass in your home theater.
Cheap Upgrade 7: Decouple your Subwoofer
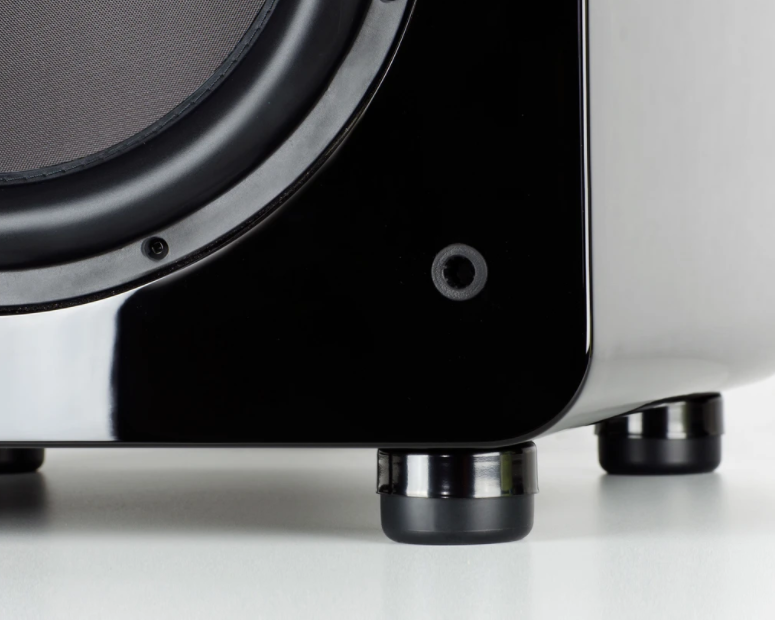
One of the most common complaints we hear from people after they add a subwoofer is that either things are rattling in their theater or that other people in the house are complaining about the bass in other rooms. The source of both of these complaints is the same: the subwoofer is shaking the house. This happens because the sub is sitting directly on the floor. If you are using the carpet spikes many subs include, it is even worse. The best thing you can do is to decouple your subwoofer. Decoupling means to sever the direct connection between the sub and the floor. This direct connection allows the vibrations of the sub to transfer into the structure of your home. By decoupling, you will find that your rattle problems are reduced and others may not notice the bass in other rooms of the house as much.
There are a lot of decoupling solutions out there. Before you invest any money in them, you’ll want to know if decoupling will really make a difference in your home theater. Go grab a bunch of towels or a couple of thick blankets. Place these under your subwoofer and demo some of the scenes where you notice the most rattles or complaints. If you have a down-firing subwoofer and can’t place the blankets underneath, don’t worry. You can put your subwoofer on its side. If you notice an improvement, you can look for a more permanent solution.
For more information about room acoustics and how to make your home theater sound better, check out our Understanding Room Acoustics article!
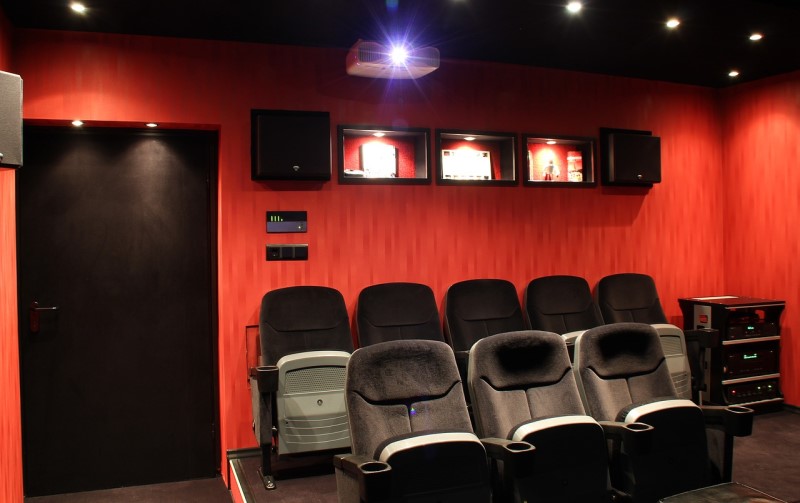
Improve your Home Theater Experience on the Cheap
Maybe you love your picture. Everything looks great to you. You’ve dialed in your speakers and subwoofers.
Cheap Upgrade 8: Upgrade your Remote Control
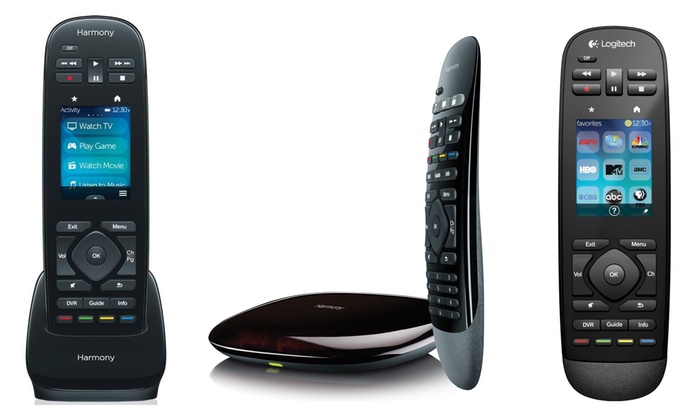
One of the most annoying things for most people is not knowing what remote to use. A box of remotes near your couch is no way to live. Instead, invest in an advanced remote control system. While this is probably the most expensive “cheap” upgrade on the list, it is the one that everyone will appreciate the most. Look into the Harmony line of remotes. We love their offerings with the hub. These remotes can control everything from your home theater equipment, game consoles, home automation, or even lights. All from one remote.
Cheap Upgrade 9: Automation
Home automation is all the rage these days. Honestly, it has never been easier to add automation to your home theater. The key to adding automation is to pick something manageable and add it. No matter what it is, it will start you down the path of more and more automation. While you might already have a voice assistant device, or a camera doorbell system, whatever it is, figure out how to make it work with your home theater.
One of the ways we love to do this is to add smart plugs to your theater. This allows you to turn on and off devices as you turn on and off the equipment in your theater. If you have a Harmony remote, check out Z-Wave outlets. If you are using a voice assistant, there are lots of options but be careful when purchasing. Some of them require a hub and others do not. Buy accordingly. We won’t recommend any specific products here as we haven’t had many interactions with them. We are getting some in for review soon. Check back!
Cheap Upgrade 10: Move your Seats
Wait a second, didn’t moving the couch come up before? As a matter of fact, it did. Changing the orientation of your seating can make a huge difference in your home theater experience. Unfortunately, most people don’t like to move furniture. But, you can experience some major upgrades to your home theater if you do. We’ve already discussed how you can achieve sonic benefits. But what else?
When people think about upgrades to their home theaters, the first thing they think about is buying a bigger TV. But what does a bigger TV get you that moving your seat closer to your TV doesn’t? Other than higher resolution, HDR, and a host of other features, not much. When people are thinking about buying a new TV, it is because they want a bigger picture. You can achieve that for free if you just slide your couch a couple of feet closer to your display. And what is cheaper than free? Nothing! That’s what!
Conclusion
Not all of our cheap upgrades to your home theater are free, but many of them are very, very cheap. Move some furniture, buy some drapes, adjust your subwoofer location, and BOOM! New home theater experience. While we all love to buy new gear, it pays to try a couple of these tips out in your home theater. That way, when you can afford that new TV or that second subwoofer, your theater will be all the more ready for it. And at these prices, what do you have to lose?

I am all for a remote control but how can you turn on an Adcom T8?
Matt, I didn’t find an Adcom T8 but I did find an Aircom T8 which is a cooling fan for your receiver? If that is what you are referring to, you should never turn it off. Set it to SMART mode and it will turn on and off as needed when your receiver heats up. It doesn’t have IR control or any other method of control like a 12v trigger. If you want that to turn off, you’ll have to press the button I’m afraid.