Lengthening Speaker Wire for Home Theater
There are a lot of reasons you might want to make a speaker wire slightly longer. Maybe you have a couple of pieces but need one longer piece? Maybe the wire was run in the wall but now you need to relocate your speaker (perhaps for better Atmos positioning)? Regardless, there are good and bad ways to lengthen speaker wire. We break down some of the solutions and why one is the best.
Step 1: Turn Everything Off
We feel we shouldn’t have to say this, but turn everything off before you begin. You don’t want power running through the wires as you are working on them. This isn’t because of an electrical shock – speaker wire is low voltage and is unlikely to do much more than cause you a little discomfort. This is because if you touch the exposed wires together, you could cause a short and damage your receiver or speakers.
Now that we’ve said that, on to the splicing methods.
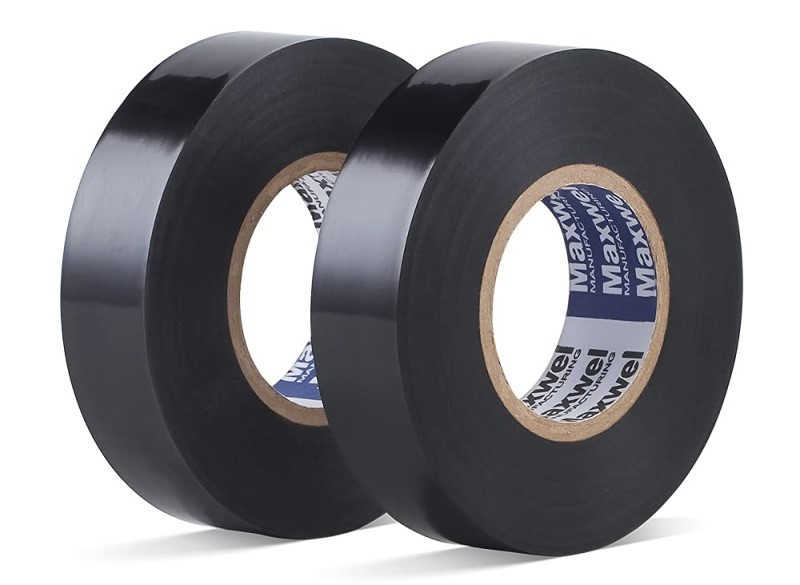
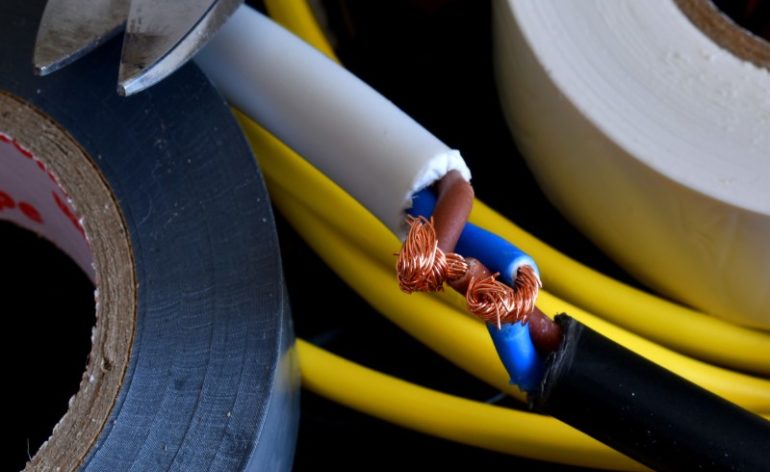
Good: Twist and Electrical Tape
If you have to do something quickly, you can strip a bit of wire from both sides and twist them together. Speaker wire is insulated, so you’ll need to wrap the splice with electrical tape. This will not only insulate the exposed wire, but also strengthen the connection. For best results, offset the connections. This means to cut the wires at different points so that there is about a six-inch difference between the two. That way, if the splice breaks on both, the wires won’t touch each other and cause a short.
The downside of this method is strength. No matter how much tape you use, there will always be the chance that the splice will fail under even mild loads. If you really want to lengthen your speaker wire, this will work. But there are much better methods.
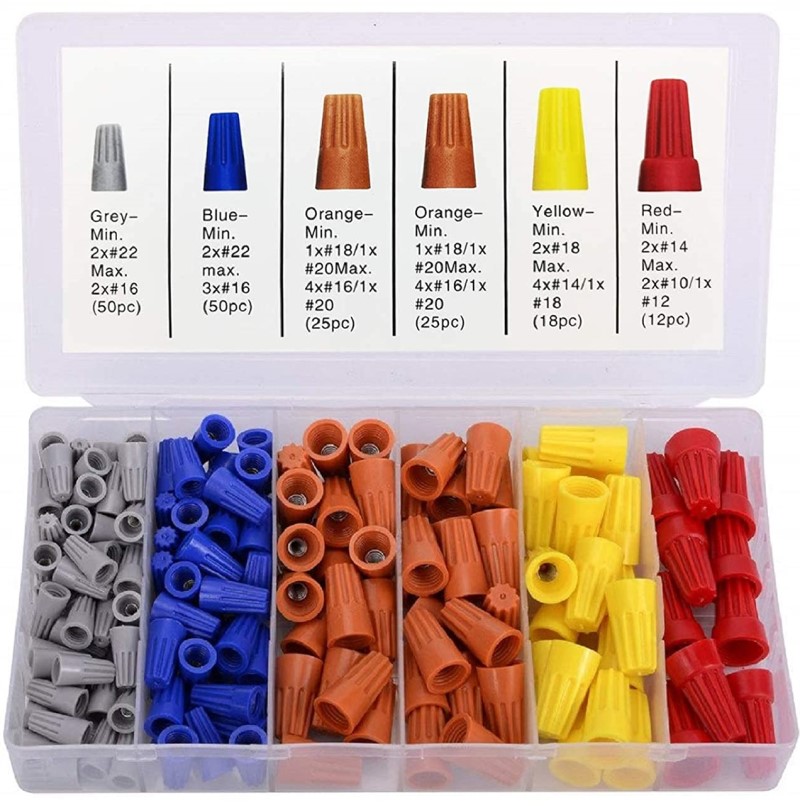
Better: Add Wire Nuts
If you’re like me, you’ve got a jar of miscellaneous nuts, bolts, and other stuff out in your garage. In there, you’ll probably find a couple of wire nuts. Again, you’ll want to offset your splices to avoid shorts if something fails. Like the electrical tape method, you’ll twist the pairs together, but then you’ll add the wire nuts. This will make the connection slightly stronger (if much bulkier). You’ll still want to wrap the whole thing in electrical tape as well. Wire nuts are rated for different wire gauges (indicated by their color). Make sure you use the proper size.
Again, this method might be stronger, but it isn’t foolproof. Pulling on your speaker wires can cause the splice to fail. Plus, this method is much bulkier. There is something better.

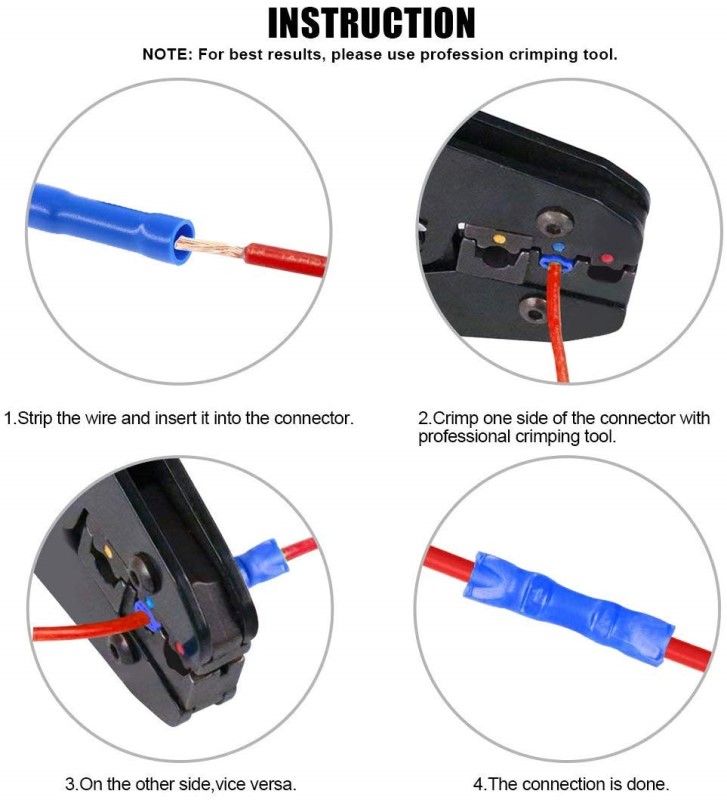
Best: Butt Splice
Now, I know what you are thinking. We wrote an article about lengthening speaker wire just so we could type butt splice over and over. And you’re not wrong. But the butt splice is one of the best methods for lengthening speaker wire. You’ll need to order a few (we’d get some sort of combo pack that has different sizes) but it is really easy to do.
You strip a bit of the end of each wire, insert them into each end of the butt splice, and then crimp the wire in place. With some butt splices, you can then melt the included heat shrink to insulate the wire. Heat shrink isn’t always included so if you want some, buy the correct butt splice or buy heat shrink.
Of course, make sure you use the proper size butt splice. We’d still suggest you offset your splices and wrap it in some electrical tape. But you probably don’t need to (especially true if you use heat shrink). The butt splice, when done correctly, is as strong as the original wire. Here’s a video with detailed instructions (link). Here’s another one with even MORE details (link).
What About Soldering?
If you know how to solder two wires together, what are you doing here? But, honestly, the difference between a butt splice and a soldered solution is minimal. If anything, the butt splice is an easier way to lengthen your speaker wire. If you really want to know more about soldering, that second video covers both butt splices and soldering.
What About In-Wall Speaker Wires
Here, we run into an extra step. If at all possible, you should probably run new wire. But if you can’t run new speaker wire, and you need to lengthen it at a point that is in a wall, you’ll need to install an electrical box. The box should be accessible from inside the room (needs a wall plate) and the splice needs to be completely contained within the box. We’d still recommend a butt splice but any of the methods should be okay.
Conclusion
Sure, lengthening your speaker wire in your home theater isn’t the most glamorous thing, but it sometimes needs to be done. And if you use a butt splice, it will be safe and actually pretty easy. Plus, we got to type butt splice a whole bunch. And that was fun. Butt splice.
