Safely Running Power to Your Projector or Wall-Mounted TV
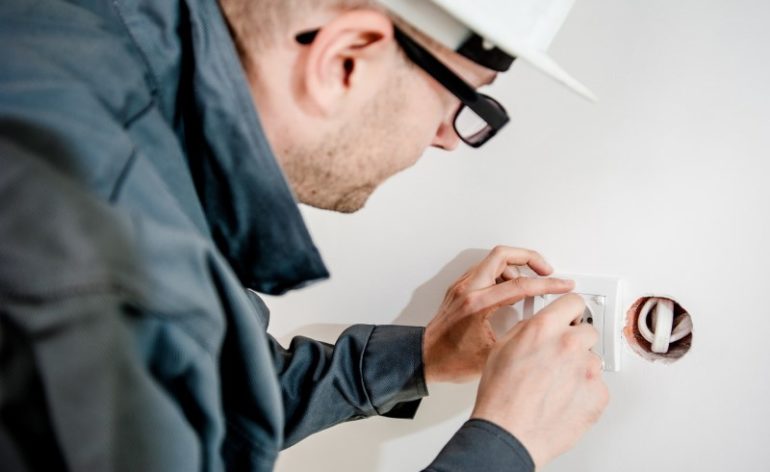
Lots of home theater enthusiasts have projectors near or at the back of their rooms. Even more people have or want a wall-mounted TV with no visible wires. Either way, you end up needing to run power through a wall to your display. But safely running power to your projector or wall-mounted TV isn’t always as easy as you think. Believe us, when you see those home makeover shows, there ain’t nothing plugged in to those wall-mounted TVs. So, how do you run power to your projector or wall-mounted TV safely? We’ve got the answer!
What You Definitely Cannot Do
Your first thought, especially if you have a wall-mounted TV (less so with a projector) is to use something like a brush plate to snake your power cord inside the wall. What is a brush plate? This is:
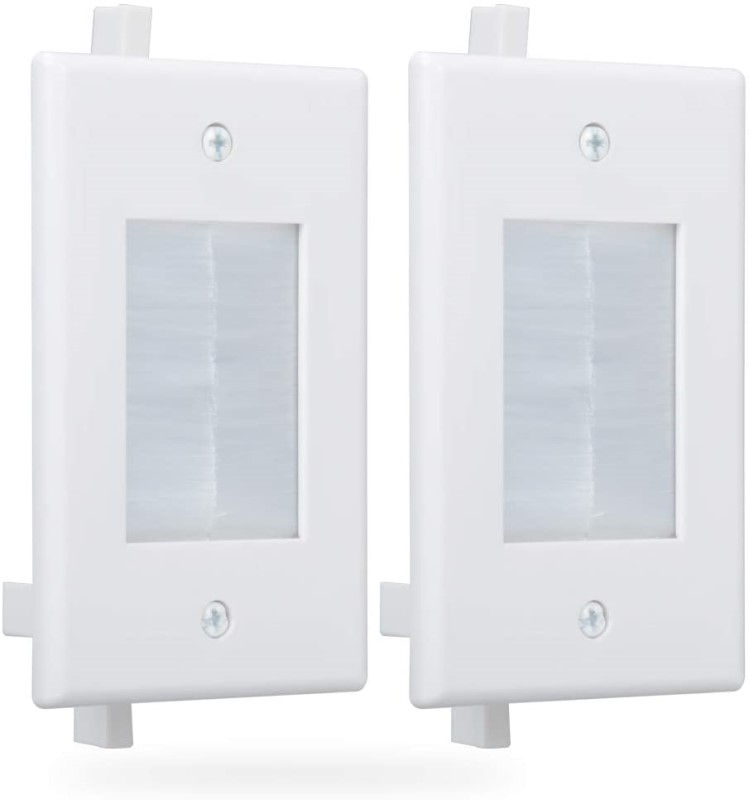
Don’t get us wrong, brush plates are perfectly fine for low-voltage applications (as long as the wires are rated for in-wall installation). Speaker wire, HDMI, or other video cables…these are all fine for brush plates. But power is a different thing. Running a power cable through a brush plate isn’t only not safe, it is against code! That means if there is a fire, it could invalidate your home insurance. You definitely don’t want that.
So…An Electrician Then?
So, you might be thinking that you’ll need to hire an electrician to safely run power to your wall-mounted TV or projector. Nope. It is fairly easy to do yourself. And if you are like me, and are deathly afraid of touching anything that might shock you, fear not! You will never need to touch a live wire during this process!
The Breakdown
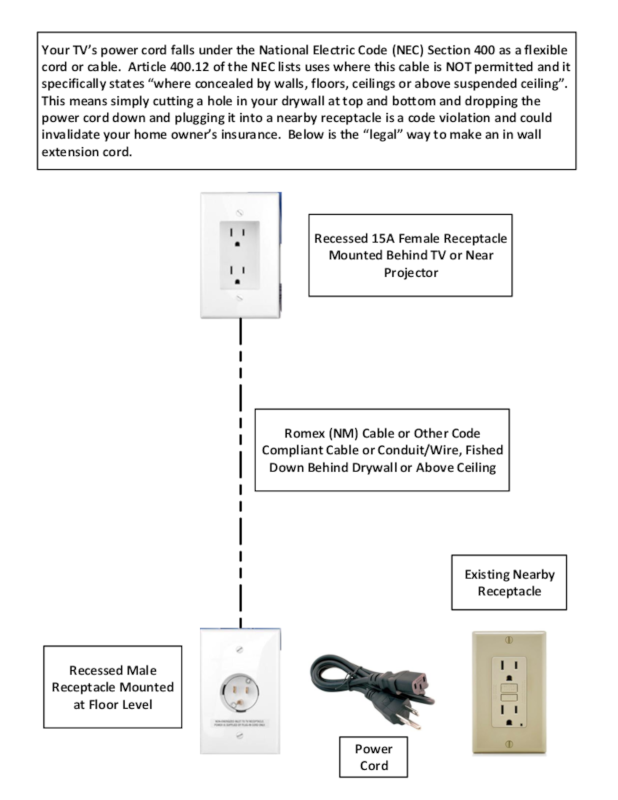
Before we give you recommendations for products that will help you out, let’s talk about what we are creating. Essentially, what you need is an in-wall extension cord. You can’t just run the power cord from your display through the wall because it isn’t rated for in-wall installation. Instead, you’ll need the right wire, the right terminations, and one extra power cord. Let’s take it from the top (the location of your display) to the bottom (the location of your AV receiver and other equipment).
Author’s Note: Never assume you know what is behind your drywall. The explanation (and any videos you may see on how to do this) all assume that there is nothing but air behind your drywall. We always recommend you use a stud finder to inspect behind the drywall (not just left to right, also top to bottom because of fire breaks). If you open the wall and find out you have insulation back there, you’ll likely need to invest in some fish tape to guide the wire. If you’ve ever started a “simple” home project before, you know how very wrong they can go. Take your time and be prepared for hiccups.
The Top
Behind (or near in the case of a projector) your TV you’ll want some sort of normal power outlet. Just like the ones all over your house. But this outlet won’t be connected to the rest of the power lines in your home. Instead, you’ll need some Romex (Amazon Link) and a backer box (most likely an “old work” box like this one). You’ll push out one of the tabs on the backer box and run the wire into the box. You’ll connect the wire to the outlet. The other end? We’re getting to that.
In The Wall
In the wall, you’ll be running the Romex to where the rest of your AV gear lives. This may be down the wall a few feet or it might be all the way across the room from your projector. Either way, we want you to terminate it at the rest of your AV gear. The reason? Keep reading.
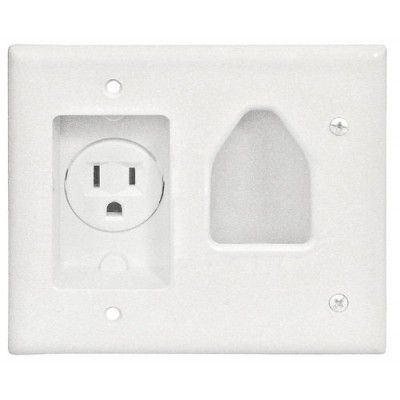
The Bottom
Near your AV rack, you’ll install a male outlet. Again, you’ll need a backer box. The male outlet looks just like the port on the back of your receiver, projector, or TV that accepts the power cord. You can find these individually, but they usually come as part of a set. And they often have ways of easily running the rest of your cabling that you would need (specifically HDMI for modern displays).
Lastly, it is important to note that you should be plugging your display, especially if it is a projector, into a battery backup. All of these diagrams show the final power cord plugging into a wall outlet. While this will work, we highly recommend using a battery. Anything with a fan will need a few extra minutes of power if your power goes out to finish its cooling cycle. This is why we want you to terminate the Romex near your AV rack. Battery backups have multiple outlets and you’ll want to use some of those for the rest of your AV gear.
For those that prefer pictures along with words, here you go:
Best Solution for Flat Panel Displays
If you have a traditional setup, meaning a flat panel mounted to the wall just above a stand containing all your AV gear, we have a great solution for you. The Echogear In-Wall Cable Management Kit has everything you need to run power safely to your wall-mounted TV (probably not your projector). You won’t even have to buy Romex as they have a proprietary in-wall wire solution included. The downside? The top and bottom plates need to be no more than five feet from each other.
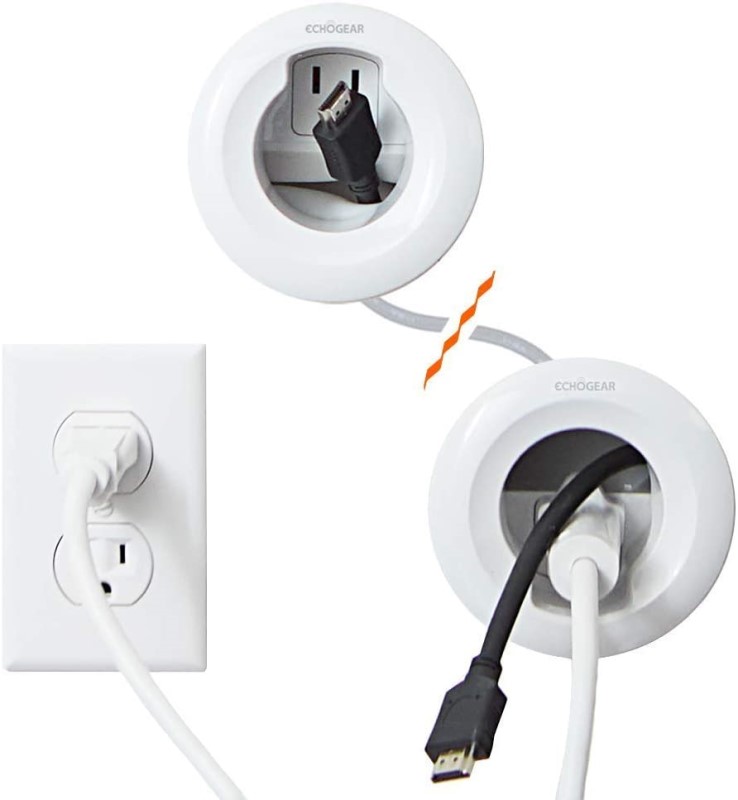
This kit truly has just about everything you need. It even includes a hole saw. There is no need for backer boxes as their solution incorporated them. There is an included pass-through for your low voltage cables too. If you are looking for a one-stop solution, this is the one. They have other solutions if you need more outlets or if you have a soundbar mounted lower. Very cool.
Best Solution for Projectors
Projectors are usually much farther away than wall-mounted TVs so the above solution won’t work for safely running power. Instead, you need something more flexible. The Top Greener Cable Management System doesn’t have the best instructions reportedly, but, after reading our article, you likely won’t need them. This solution includes just about everything you need except for a drywall saw and the Romex. It comes with some Romex, but we guarantee it won’t be enough (six feet reportedly).
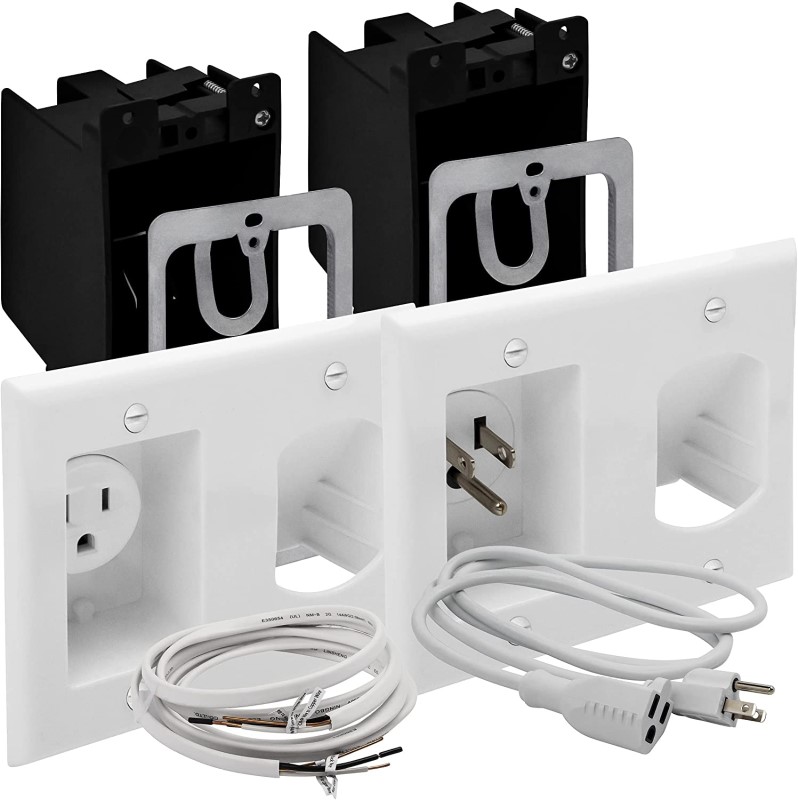
Adding your own Romex means you can mount these wherever you want. The black boxes are for the power side, and the silver, metal rectangles are for the low voltage side. They even come with an extra power cord to run to your battery backup!
Wrap Up
There you have it. Not only did we give you product recommendations on how to safely run power to your projector or wall-mounted TV, but we explained how and why our way is the best. Do you have a different (and preferably less expensive) solution to share? Let us and our readers know in the comments below! We’re always on the lookout for a deal!
