Simplifying Home Theater Receivers
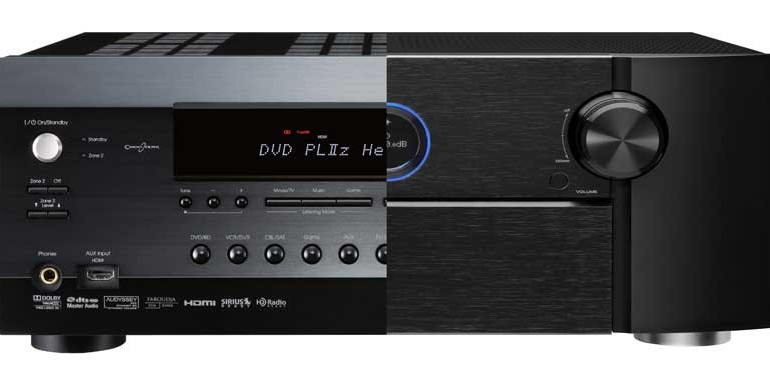
I think that when people look at home theater receivers for the first time there is a sort of tendency to glaze over. AV receivers are complex—far too complex, in fact. There’s no reason for it except that the home theater manufacturing community has gone the way of Microsoft instead of, for example, the way of Apple Computer. AV receivers can do just about anything, accept virtually any connection and accomplish just about any task.
It’s all far too confusing for the average consumer and it brings back memories of setting the clock on your VCR back in the days when “good” claymation was considered really cool. I mean to tear apart the AV receiver and explain its parts so you can more easily understand how to go about the task of getting one configured. This isn’t a step-by-step article, for that you want to read our Setting Up an AV Receiver article.
This article is going to be more basic. It’s going to deliver a sense of the big picture, so you can better navigate ANY product you may encounter. The overarching picture is that you are wiring up your home theater components, telling the receiver what you’ve done, and then verifying the results to your satisfaction. That’s it. Exactly how that works on each surround receiver may differ, but the principles are the same.
I’ll also use this article to gripe about the overcomplex world of receivers. Because they really are way too overengineered. It should be simple to set up home theater receivers, and it’s not.
Make Your Connections
First and foremost, you want to think of home theater receivers as the “hub” of sorts. They are the centerpiece of your AV entertainment system. It’s the hub, because it is the place where audio and video inputs arrive, and also where they depart to their final destinations. That means that if you were mapping out your AV system, the home theater surround receiver would be at the center, surrounded by your sources and your speakers.
When setting up an AV receiver, start with your inputs, you want to make sure that you use the best possible connections into your surround receiver—typically those are digital audio and digital video connections, like HDMI. Here is a hierarchy of connections you should use (in the order you should use them):
- Video: HDMI > component > composite
- Audio: HDMI > Digital coax/Digital TOSlink S/PDIF > stereo analogue (RCA)
For your outputs, you are simply connecting your speakers, via speaker wire, to the appropriate outputs of your AV receiver so they can be properly powered by the on-board amplifiers. You will need to connect at least a front Left/Right pair, but if you are running surround sound you will also have a Center channel and Surrounds and maybe even Surround Back speakers. If you have a more advanced system, you may also be wiring up some Zone 2 speakers to the Zone 2 speaker output terminals. Speaker terminals are typically 5-way binding posts, and you can use either bare wire, banana connectors, or spade connectors to make your connections.
Simplifying Connections: What Home Theater Receivers Do Wrong
HDMI brought a simplified interface to home theater receivers. Now, instead of separate analogue audio and video connections, you could simply connect an HDMI cable to carry digital audio and video signals from your equipment to the AV receiver, and even to your television. The problem is, HDMI never standardized the “language” used to talk between devices. That means that an AV receiver still has to be “told” it is connected to a Blu-ray player. It still needs to be “told” when an Xbox One has been added to it. There is nothing to say to the receiver (via HDMI), “Hey, I’m an Xbox. I need the following considerations, and I should be assigned to a particular input on the receiver.”
That means that instead of simply connecting your gear and sitting back and enjoying it, most AV receivers need to be told where everything is and what inputs to use for each piece of gear you want to watch and/or listen to. It’s all rather boring, and it’s the one unfortunate thing that we lament about these otherwise impressive devices and technologies. AV receivers don’t need more features, they need easier integration. Plain and simple.
And so, after connecting all your gear, you need to (as an example) make sure that when you select “HDMI 2” on the remote you get the Xbox One, and that you get it via HDMI, and that you indeed want it to operate in Direct Mode.
Setup Your Connected System
One area where AV receivers get it right (mostly) is in the area of automated setup. Most receivers (even the entry level models, it seems) now come with a microphone that, when placed in the listening position, lets you press a button to take measurements of the room and speakers. Most of these systems do a decent job of setting the correct speaker levels, however they often have unexpected results in the area of both Room EQ and when setting crossovers. That means that, even though they bothered to set up and program a system to measure the room and speakers and set levels and do the hard work of evaluation—they neglected to make it smart enough to know that if your speaker can’t play down to 20Hz then it should probably be set to “Small”.
We like using these auto setup systems when you don’t have an SPL meter handy, but they rarely nail the crossover settings properly—and almost never yield good effects when they are used to EQ a room. As a result, our recommendation is to use them as a last resort, and always double check your work. The exception we can make is with the use of higher end room calibration models that come with flagship-level products and which feature advanced multi-point measurement systems.
Listen and Tweak
After you get your system connected and calibrated, the final thing you want to do is listen to it…and tweak. Every room is different and half the fun is listening to what your system sounds like and figuring out if there are ways to improve it with the tools you have on hand (your ears and perhaps a trusty SPL meter or maybe an app).
Then go listen some more because…well, why not?


Thoroughly enjoyed and empathized with both the Simplifying and How to fix articles. Feature creep has been going since the 70’s and today’s equipment is such a hassle its just not worth it. I have a Pio SC-63 and have no earthly idea how to run it. I know it can run everything I would like it to , I just dont know how. Its dumb, zero intuition. The manual might as well be in Portuguese for all the info I have gotten out of it. In order to activate the B side speakers one has to know to push a button on the remote and then push 7 on the keypad. You serious Clark??? You’re correct when you wrote that if the mfg’s were to make a receiver as simple as the iphone it would jump start sales. I’d buy. Just venting here! All I ever really wanted it to do is play music, dvd, and stream using Sonos. Oh, and power my patio speakers which should be easy to do with 7 amplifiers but as of 3 years later, I never have figured that one out because, honestly, nothing should be that difficult. And after reading your articles, you believe that also. Thanks for listening. Steve
I think the market would reward a simplified 4.1 or 5.1 receiver. Now that sound bars are popular, I wonder if any of the manufacturers will deliver on it
I don’t see any reason why removing channels from receiver offerings would be warranted. People still buy one receiver over the other because of a handful of watts. Selling 7.1 over 5 or 4.1 receivers makes sense. No, some people won’t use the extra channels, but they’ll buy the receiver because it has a higher number on it. Sad fact I’m afraid.