Update! Sonoff NSPanel Pro – Home Automation Bliss?
I love Smart Home tech. When I designed my home theater, I wanted to integrate cool/nerdy automation with my lighting. But back in the mid-’00s, the tech needed to be more robust and integrated. Well, rejoice because whole-house smart integration is getting advanced. Enter the Sonoff NSPanel Pro powered by eWeLink, and all its smart goodies. Is this the integration solution you have been looking for? Let’s discuss.
Note: This review has a six-month update at the end. Scroll down to find out how the Sonoff NSPanel Pro has changed!
In The Box
My press kit from eWeLink included the NSPanel Pro, Sonoff Smart Security Camera, Smart Plugs, Smart RGB LED Lightbulb, humidity/temp sensor, and a trio of door contacts and motion sensors.
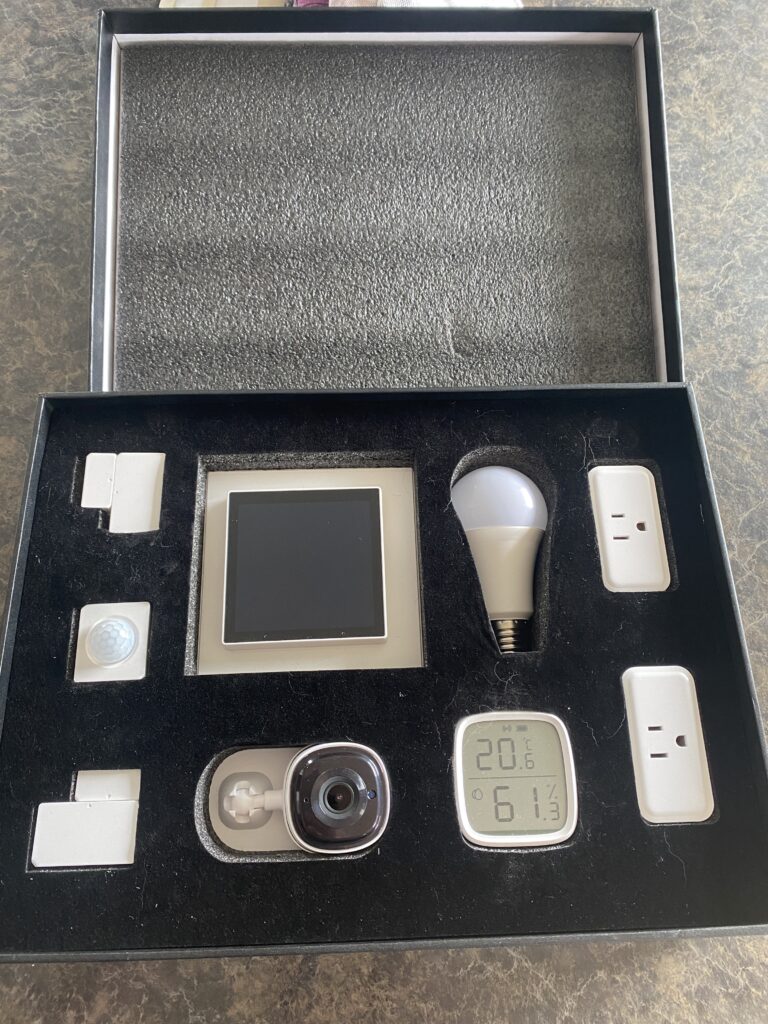
The kit gave me enough smart gear to set up a room with the basics and give me an idea of what else you might need or want for your smart house. Obviously, you’d have to buy all these separately (I’ve included Amazon links above to help you out).
Quality
The quality of all the products is outstanding. But if we are being honest, I didn’t expect anything less from Sonoff. Sonoff makes some of the best IoT (Internet of Things) stuff out there and shines here.
I have always said that I am a huge geek, and I stand by that. Since I started my home theater journey, I have been looking for a cost-effective way to integrate a smart home touch screen into my setup that a) didn’t bankrupt me, b) looked super hi-tech, and c) had compatibility with the popular smart home tech. Well, Sonoff accomplished that with the NSPanel Pro.
NSPanel Pro – Under The Hood
Since the NSPanel Pro is the system’s heart, I will focus most on it. So what is it? And why should you want to shell out $130 for it? Let’s take a closer look.
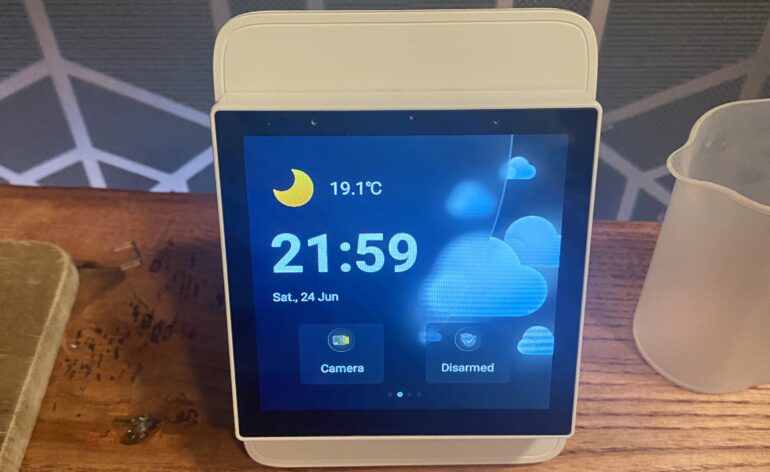
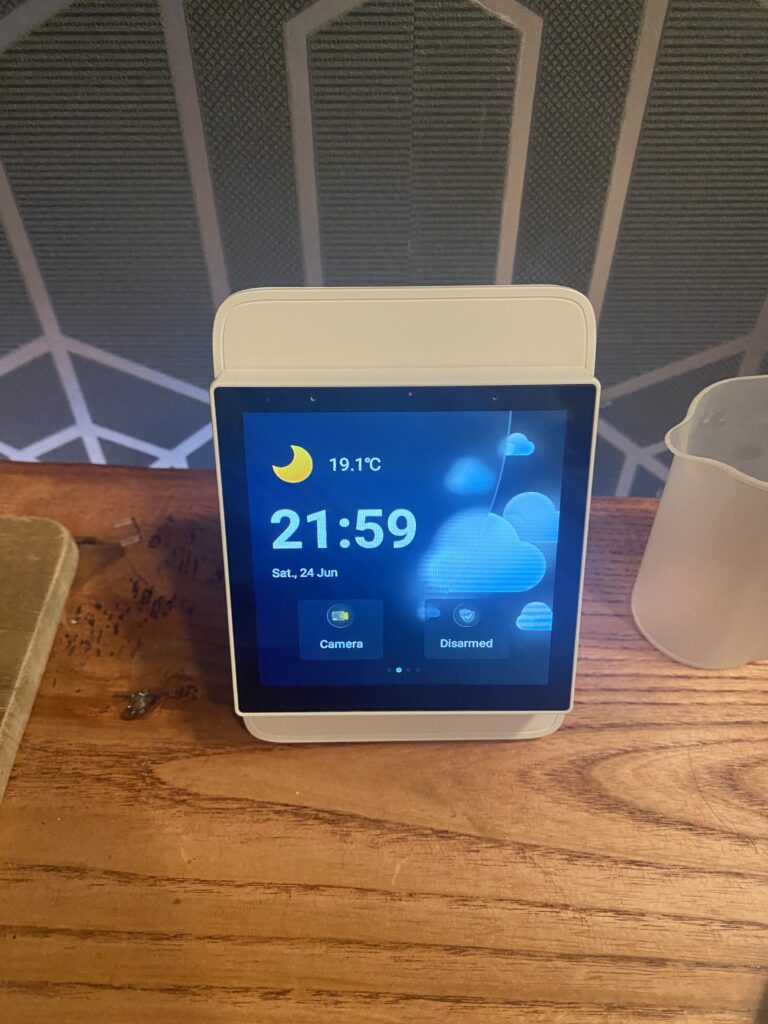
The NSPanel Pro features a 3.95″, 480×480 TFT LCD multi-touch screen and boasts 16.7M colors. On top of all that, a light sensor automatically dims/brightens the display based on ambient light, and a speaker/mic combo lets you use the NSPanel Pro as a two-way intercom.
The brain of the panel features a 4-core Cortex-A35 CPU, mated with a Mali-G31 GPU that has 8GB of flashable ROM and 2GB of DDR3 RAM. Ok, Bill Nye, The Science Guy, what does that mean? Simply put, that’s a lot of processing crammed into a compact unit. This overkill implies that the NSPanel Pro won’t be obsolete in a week. I like that.
But what’s better is that the NSPanel Pro is a Zigbee 3.0-compatible WiFi hub. What is Zigbee, and why does that matter to me? Zigbee is the leading smart home protocol on the market. It allows all your Zigbee-compatible devices to link and work with your hub. To distill it further, the Zigbee Alliance has 400 members and 2800 devices compatible with the Zigbee Protocol. So your Sonoff NSPanel Pro can integrate more than Sonoff, giving you far more options for your smart-home configuration. And since it’s a hub, you don’t need to purchase an additional hub/bridge to connect all your IoT devices. Smart!
NSPanel Pro – Install and Setup
Ease of installation and setup is the real test of how good a product is. I have returned many devices requiring me to enter some weird pairing mode by repeatedly turning the light on and off in bizarre rhythms. Let me put your mind at ease now. Setting up the Sonoff NSPanel Pro is SIMPLE.
Installing The Panel
I am a capable DIYer. I can (humblebrag) frame, do electrical, hang and finish drywall, and do my own finish millwork. With that said, the thought of cutting a hole in my wall, installing a junction box, and running wire to the NSPanel Pro didn’t scare me. But what if you don’t have that skill (or want to pay an electrician) or want to avoid mounting the panel on the wall? No issues. The Sonoff NSPanel Pro installs into an enclosure stand that allows you to plug it directly into a standard 110v plug.
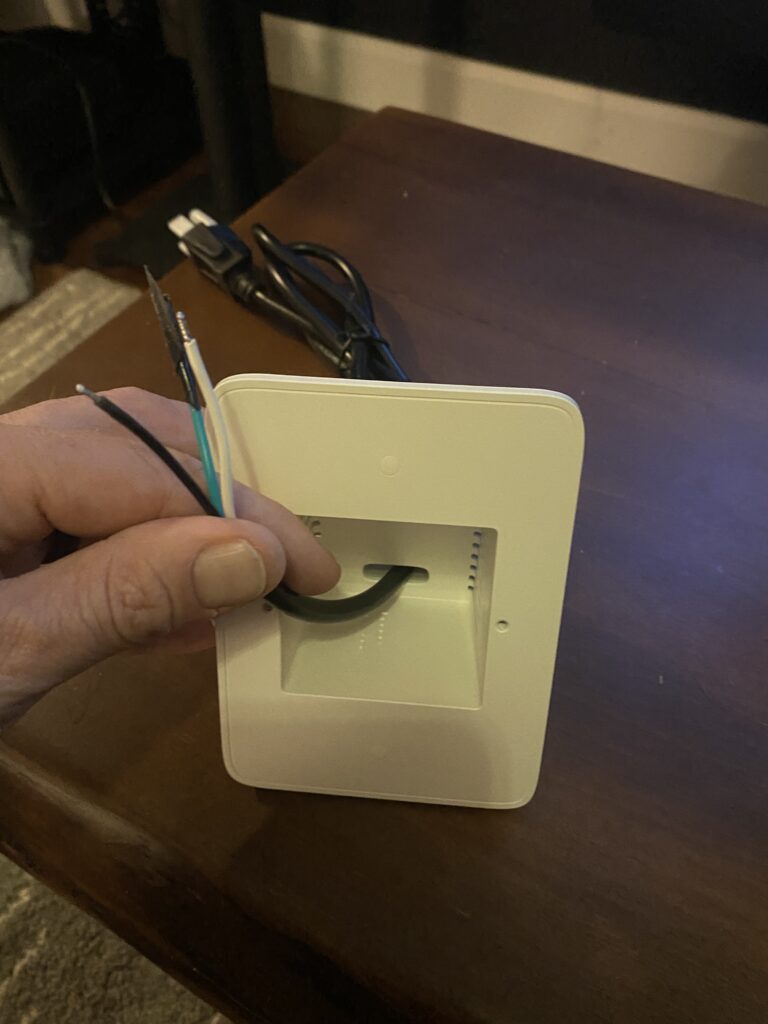
Hooking up the NSPanel Pro into the enclosure is easy. Feed the included power cord through the back of the enclosure, and secure the hot wire (black) and the neutral wire (white) into the well-labeled screw-down terminals on the back of the unit. Don’t worry if you have no electrical experience. The instructions will walk you through the hook-up with confidence. Put the panel in the correct orientation, screw it into the enclosure, and snap the TFT panel into place. Installation took less than five minutes.
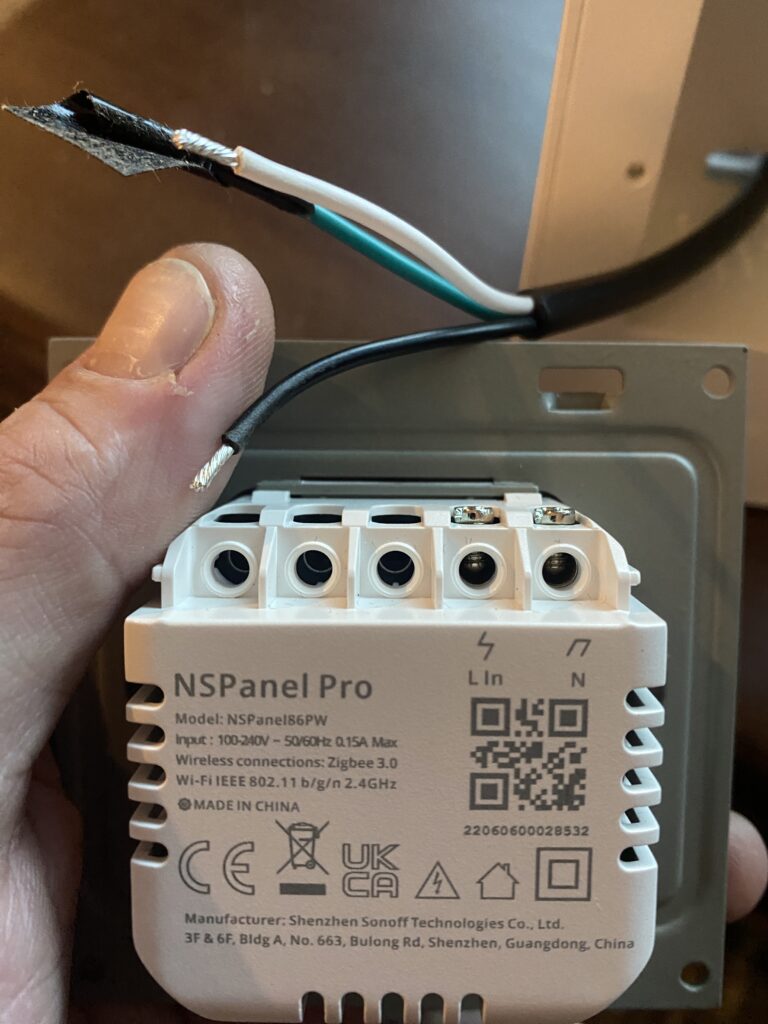
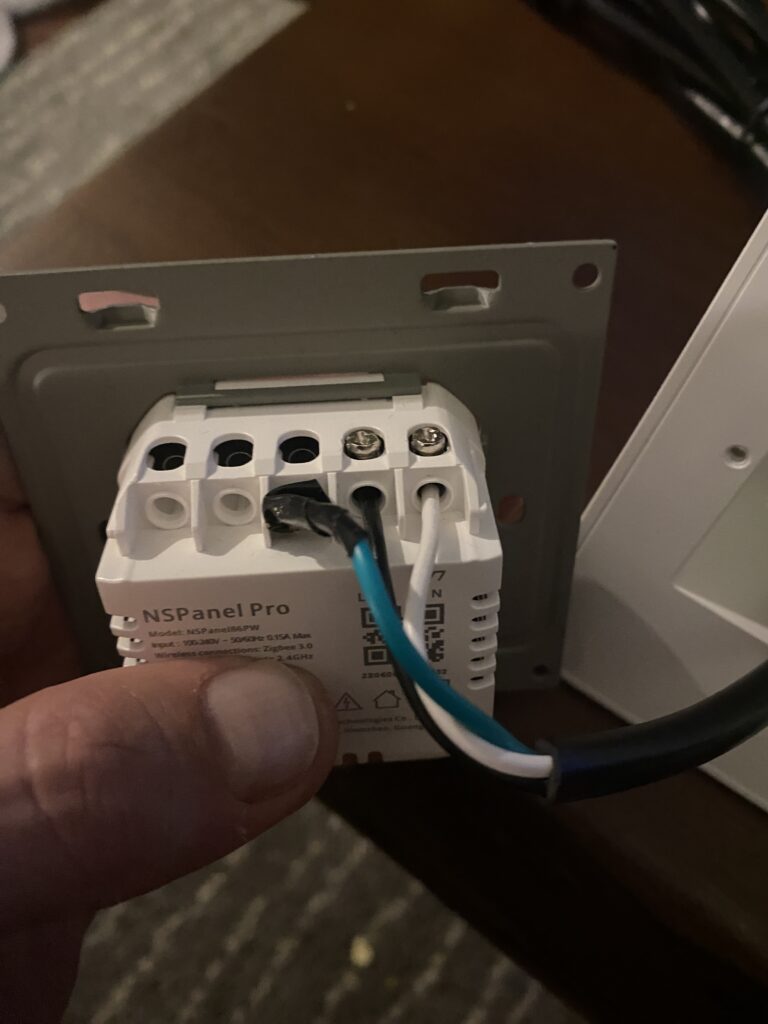
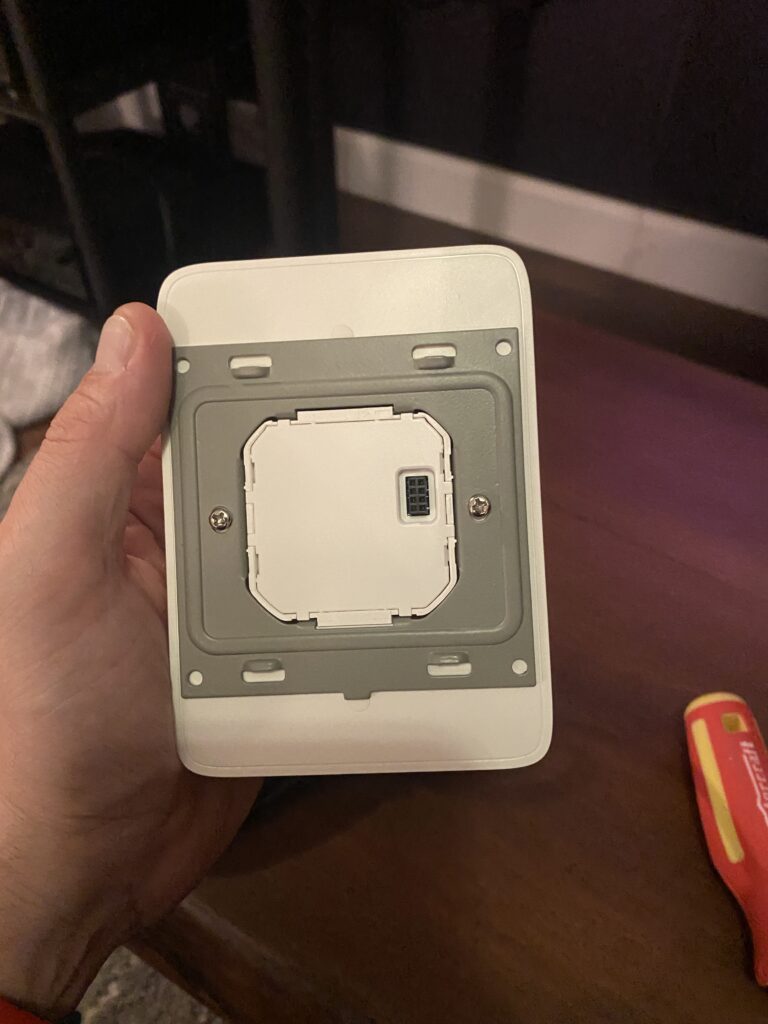
Installing it into a junction box is the same for electrical hook-up. The included mounting plate mates up to the electrical box, and you mount it the same as the enclosure. The cover plate features a screw-less design, making the panel look premium once installed. Good job Sonoff. That’s a quality touch!
Setting Up The NSPanel Pro
Setting up the Sonoff NSPanel Pro requires a few basic WiFi skills. I am a computer nerd from the ’90s, so I know my way around a router. If you don’t, you may encounter some difficulties with setting up. The problem is that the Sonoff NSPanel Pro and all the accessories work on the 2.4 GHz WiFi band. So to make the setup as simple as possible, I went into my router settings and disabled my 5.0 GHz band while setting up the panel and accessories. Don’t worry. After installing everything, I put my router back to dual 2.4 and 5 GHz bands, and everything connected properly.
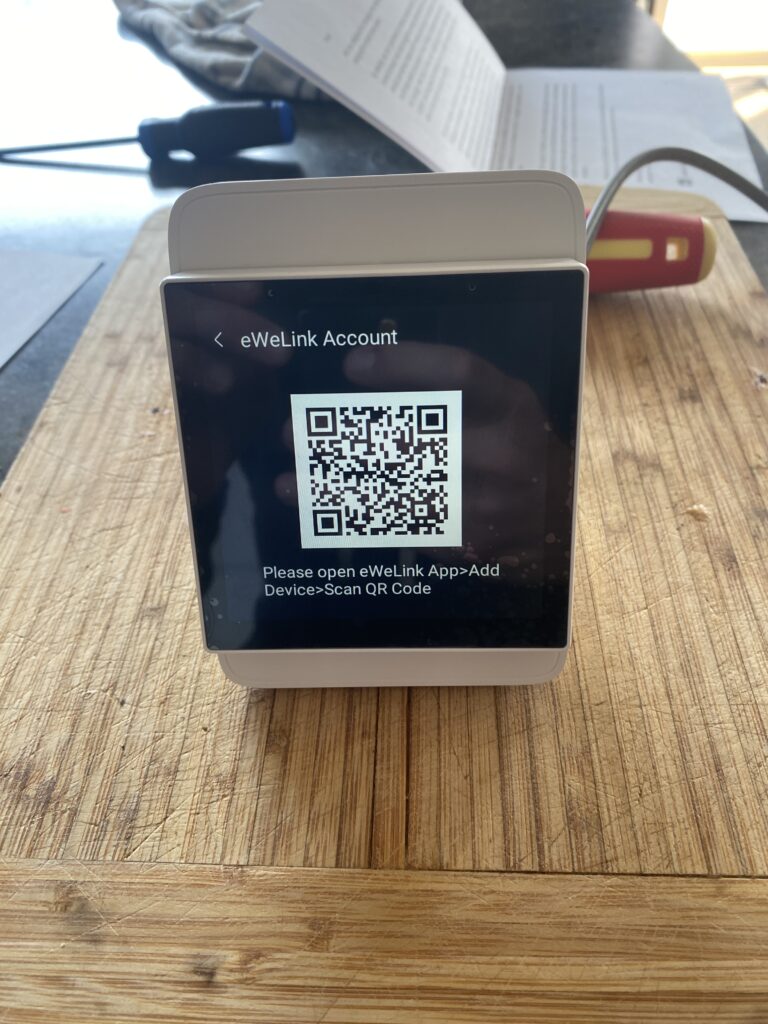
Next, I downloaded the eWeLink app from the App Store on my phone. There is both an iOS and Android app. The app requires you to sign up and create a user profile. A few minutes later, I was verified and signed in.
Pairing the unit was easy. After I plugged in the Sonoff NSPanel Pro, it booted up and displayed a QR code. I chose the appropriate menu in my app to scan it, which guided me through the setup process, requiring me to select the proper WiFi network and enter my password. It was probably one of the easier setup processes I have used.
Setting Up Devices
As I said earlier, the real test of a decent home automation kit is the ease of device setup. Devices like my Philips Hue Bridge spoiled me with an easy setup. Devices like the Sofabaton X1 were an example of a more difficult setup process. I was ready for anything and prepared myself for some troubleshooting.
However, to my delight, the setup for most devices was straightforward. I powered up the units for the smart plugs, motion sensors, and smart thermometer and selected WiFi pairing for each device I wanted to install. I followed the on-screen prompts that had me choose the WiFi for my house and enter my password. There is an option to install multiple devices simultaneously, which would speed up installing a whole house full of IoT devices.
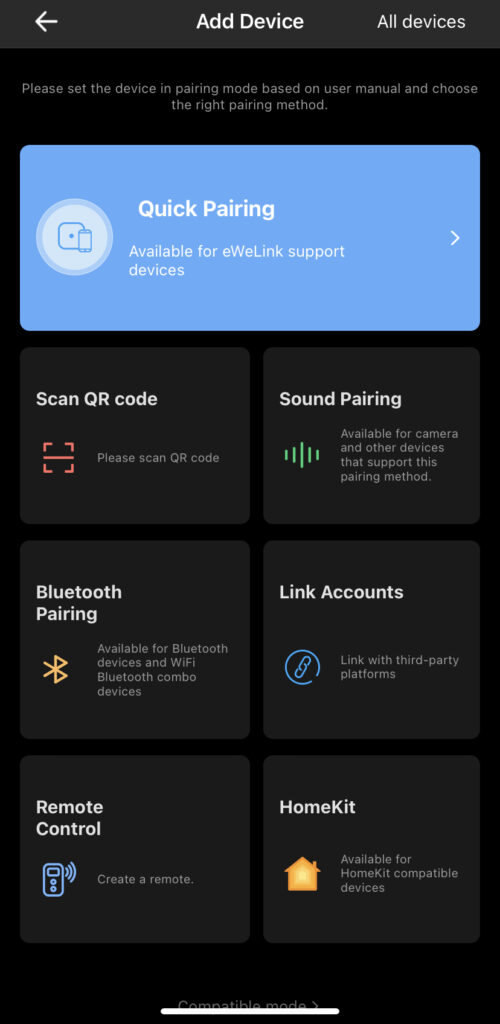
The only device that gave me an issue was the Sonoff camera. I followed the instructions, and it would not connect for me. A quick email to Sonoff and a speedy reply suggested I reset the camera to factory defaults, and I was in business. The camera uses voice connect, which transmits a tone that the panel hears and sets up your device. It was my first time using anything like that, and I must admit that it was pretty cool.
Remember when I said the Sonoff NSPanel Pro was a Zigbee 3.0 hub? Well, guess what? Some of my newer Philips Hue smart lights are also Zigbee 3.0 compatible. The app has a section for linking third-party apps like Philips Hue or Google Home. Linking my Hue was a snap. I entered my username and password, found the Hue bridge on my network, and paired the two. However, you can’t use scenes from Hue on the NSPanel Pro. I was emailing back and forth with eWeLink, and they are still working on integrating the Hue API with the panel.
Using The NSPanel Pro
We have the eWeLink NSPanel Pro ready to rock and roll. Now what? What does it do? Well, depending on what you have connected to it, you can monitor your security cameras or turn it into a security panel. Plus, I mentioned it was an intercom, and you can use it to surf the web. Those are all built into the system and are easy to set up. But what if you want to take it to the next level?
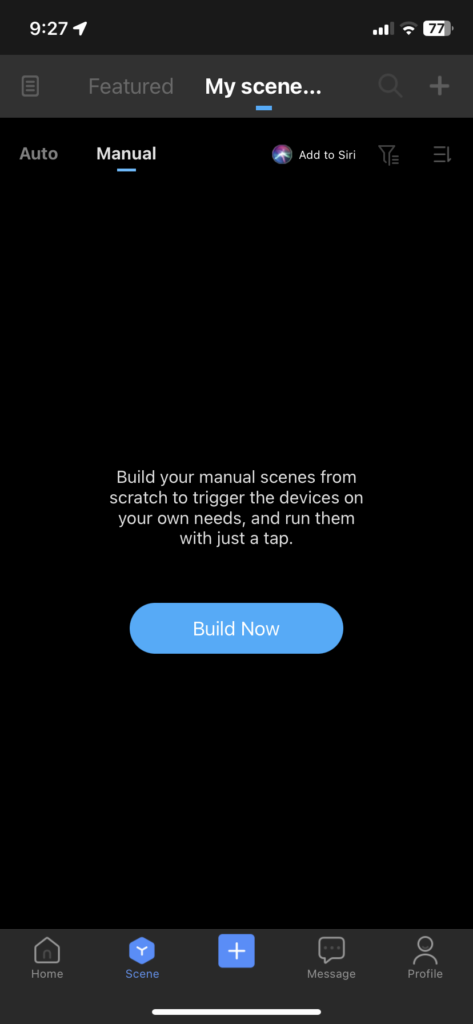
In the app is the ability to add scenes. Scenes are where the power of the NSPanel Pro shine. You can design scenes that trigger events with IF and THEN actions. For example, IF the motion sensor is triggered, THEN turn on the security camera, or send me a push notification.
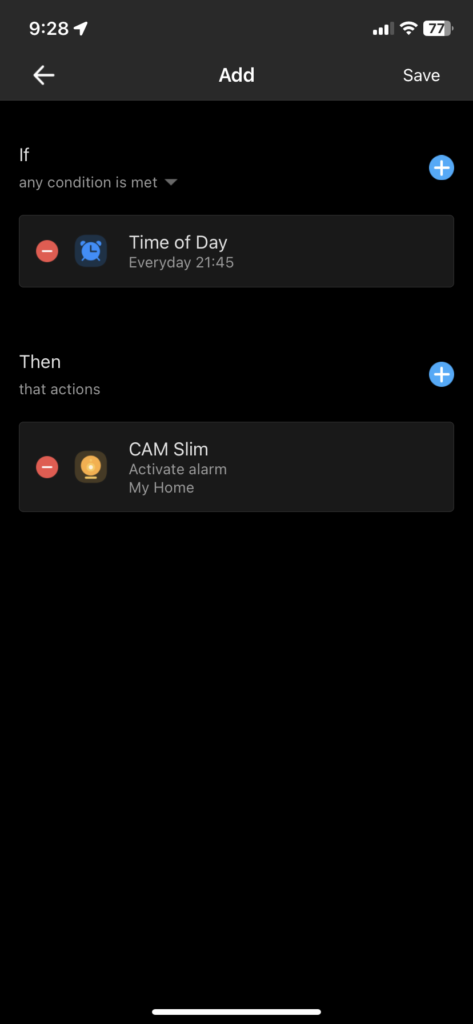
These types of automation are the heart of whole home automation, and using an app makes it easy to program them. In the past, we were limited to “programming” language and some pretty complicated (for most people) languages to get these things to work. As much a geek as I am, I struggled to get my home automation working with the “typical” system because it relied on a niche set of skills. The NSPanel Pro and the eWeLink app make home automation more accessible. And therein lies the appeal.
What It’s Not
Just like any piece of tech, it can’t be everything to everyone. There are some issues that I had with the NSPanel Pro. First, I can not integrate my Philips Hue lights with the smart panel. As I said earlier, there is work being done to get it completed, but that has not materialized, and there is no ETA for it yet.
Secondly, the NSPanel Pro is heavily dependent on the eWeLink app. This dependency means that you will always have to have the app to set up and edit activities. This indicates that the server is cloud-based and that there will always need to be that link to keep things up and running. Don’t get me wrong, I don’t hate the app by any means. But I would like to have the NSPanel Pro be the only piece I need to have to set up and control everything.
Lastly, this is still very new tech. If you want the MOST control over your gear and home automation, this is not going to get you there. This is designed for the casual home automation user (like me), who doesn’t have the knowledge (or desire) for a programming language-based solution. A good friend of mine is a programmer, and he demonstrated the type of knowledge that I would need to really take control of my home automation. This is not there…yet. But Sonoff is working towards integrating Matter into the ecosystem. If that comes to fruition, the Sonoff NSPanel Pro could really be the heart of your home automation.
Our Take
At $130, the Sonoff NSPanel Pro is a no-brainer. Putting aside the look-cool factor of having a touch screen built into your wall, the fact that it is a Zigbee 3.0 Hub with built-in IF and THEN scenes solidifies it. Plus, Sonoff is working on getting Matter integration. The Sonoff NSPanel Pro is perfect for beginners who want to dip their toes into home automation but want a device that can grow with them. So to answer the question – Is the Sonoff NSPanel Pro Home Automation Bliss? Yes!
Verdict: Get It!
April 2024 Update
It’s been about six months since my initial install and review. Am I still in Home Automation Bliss? Yes, I still am. Sonoff has integrated more connectivity with Philips Hue as promised. The NSPanel Pro will only recognize the last two generations of lights (those with Bluetooth). That means that only my color-changing lights can be controlled via the panel. This is not a deal-breaker by any means. The technology was not designed to control WiFi, and, as I upgrade my lighting, all the new lights will be compatable.
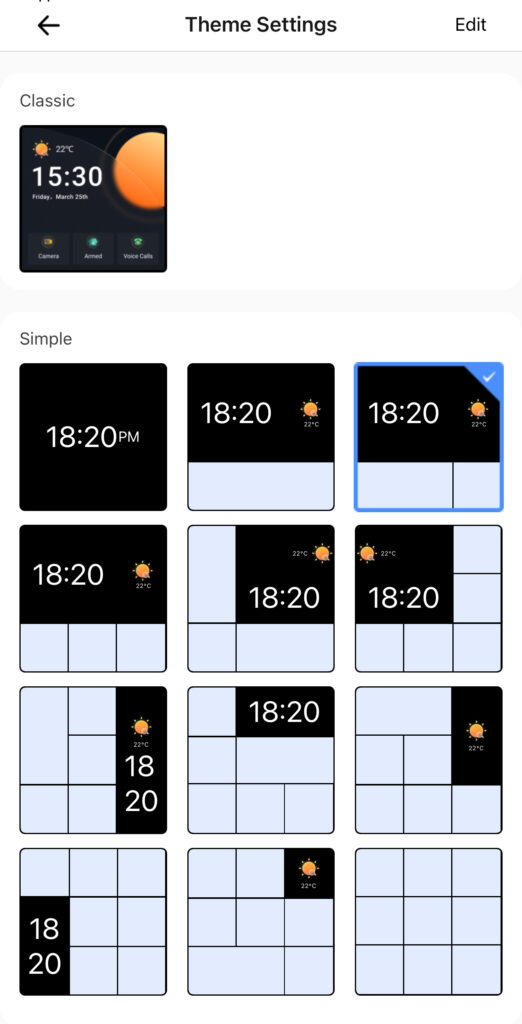
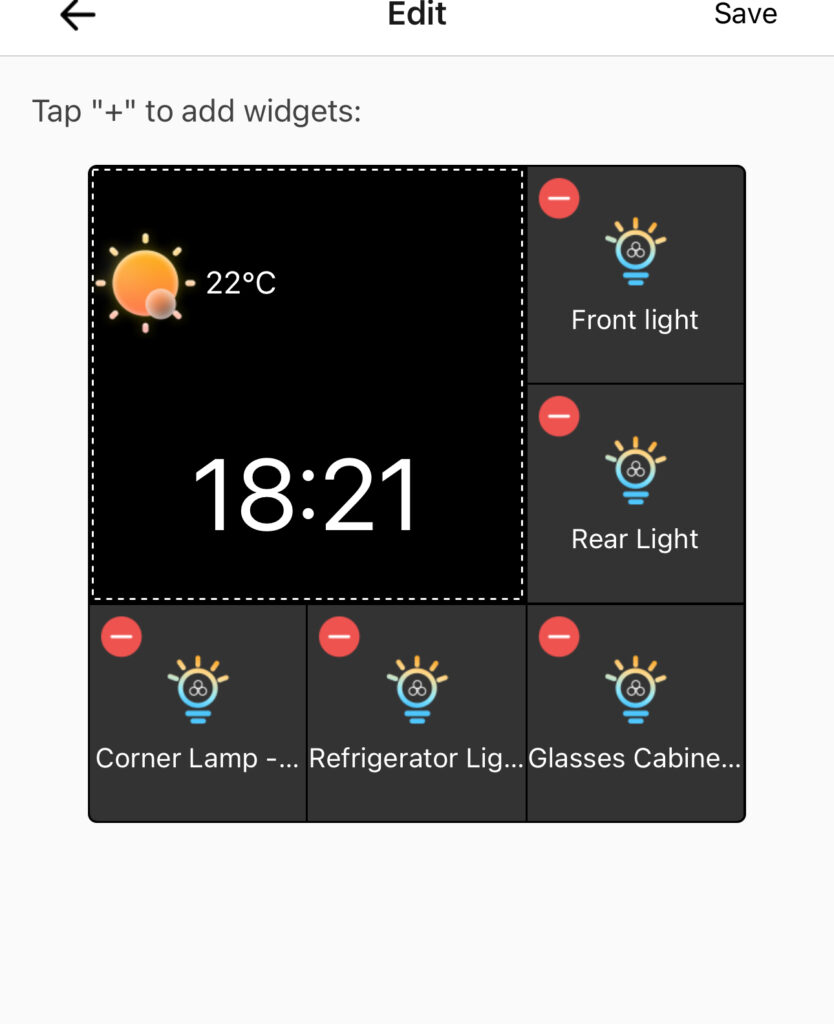
Additionally, the eWeLink app now offers more customization of the home screens via themes. You can use the original ones, or choose what widgets you want on the screen. This will be popular for those who want to display specific devices, say cameras or lights, and have them at their fingertips.
Our Take…Again
I am pleased that the Sonoff NSPanelPro receiving regular updates to software and UI. Along with a new look and functionality, Matter integration continues with Matter 5 being supported. I can see the NSPanelPro becoming the heart of a lot of folks’ home automation systems.
