Setting Speaker Levels & Distance for Home Theater Manually
Getting all the gear in the world doesn’t make for the perfect surround sound system. I mean, it’s pretty darn close, but there’s still the small issue of setting everything up correctly. We’ve got guides on configuring just about any piece of equipment and integrating it into your system. Even afterward, you need to deal with setting speaker levels and distance. While most receivers will do this for you now, you may run into the situation where you either want to check the results yourself or need to do it manually. This is how.
Check out our Setup Guides:
Setting Up Dual Subwoofers
Subwoofer Placement—Crawling Around for Bass?
Home Theater Receiver Setup Guide
Home Theater 101: Basic Speaker Setup Guide
Positioning Surround and Atmos Speakers
The Case for Setting Speaker Levels
Setting speaker levels isn’t an overly complicated procedure. It ensures the sound coming from each speaker properly reflects what happens on screen. Improper speaker levels can actually shift the sound towards the left or right side of your room. Also, while I like surround sound as much as the next guy, too-hot surrounds result in effects that take you out of the action. Instead, you want your surround speakers to encourage the “suspension of disbelief” effect that makes movies so excellent.
A lot of newer systems use microphones and automatic room set up systems to do all of this for you. We feel that understanding the basics still matters. It’s important—at least to those who really enjoy the gear. It’s kind of like learning multiplication. You don’t start with the digital calculator. You get the basics down first so you understand the mechanics of the task. The same applies here.
Setting Speaker Levels: Where to Start?
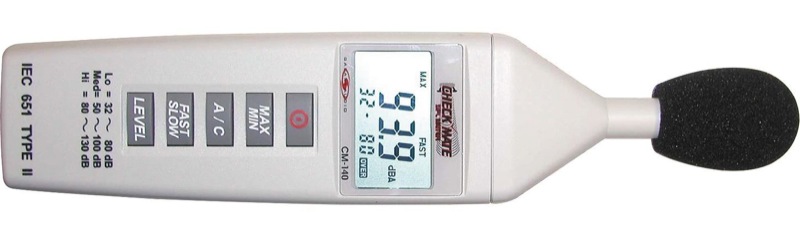
Before you get too far, there are a couple of things to take care of when calibrating speaker levels and distance. First, you need an SPL meter (sound pressure level meter) and a 15′ tape measure. With these two tools (not including, of course, somewhere to sit and your AV receiver’s remote control) you’ll be all set to complete your task. After everything is gathered, find your primary listening position and have a seat. Turn the volume down on the receiver to a quiet level. This way, when you get started on your test tones they won’t blow the paint off the walls!
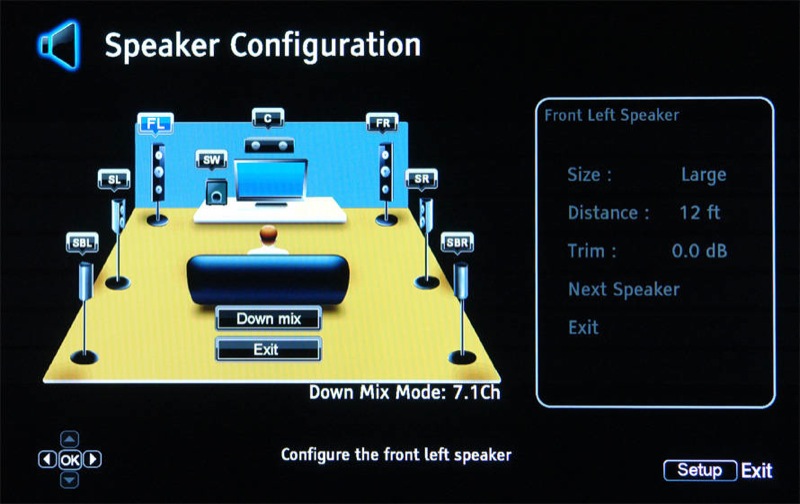
Next, locate the Speaker Settings in the Setup menu of your AV receiver. This can be in several different places depending on the manufacturer. Generally, it falls under Speaker Setup, Speaker Config, or Manual Setup. This is the “home base” for all speaker configuration settings.
Editor’s Note: Many people ask us about SPL apps that they can download for their phones. Honestly, these don’t work that great. They aren’t that accurate or consistent. SPL meters aren’t that expensive and it is a tool that you’ll use multiple times. Investing in one for the home theater enthusiast is a must.
Setting Speaker Distance (also Called Distance or Speaker Delay)
Setting speaker distance falls second in importance to levels. Once in the Speaker Setup area of the menu, you’ll want to locate the Speaker Distance or Speaker Delay settings. Once there, measure the distance from each speaker in your room to your listening position. I find it easy to simply run out the tape directly from my seat. If you don’t have the best tape measure, or it doesn’t have a large standout (where it will stay extended before snapping or dropping off) simply run it along the ground.
Try and keep the tape parallel to the ground to measure the true distance from the speaker to your seat. Specifically, you are measuring from the front baffle of the speaker to your ears when you are comfortably seated. I’ve seen people lean forward when taking these measurements. If that’s not how you sit when listening then your settings might be off by a foot or more.
Editor’s Note: The system is taking the distance you enter in order to set up proper delays for the center and surround speakers’ audio signals. This ensures the audio from all speakers reaches your ears at the same time.
Navigating the Distance Settings Menu
You’ll note that in the Distance Settings menu you can go through each speaker and enter in your measured distance. Any receiver will allow you to set the distance to the nearest .5 foot increment, but the better models will do .1 foot increments. Yet other models let you choose which resolution you prefer. Here are the common breakdowns you’ll want to know for converting inches to tenths of a foot:
- 1″ = 0.1 ft
- 2″ = 0.2 ft
- 3″ = 0.2 ft
- 4″ = 0.3 ft
- 5″ = 0.4 ft
- 6″ = 0.5 ft
- 7″ = 0.6 ft
- 8″ = 0.7 ft
- 9″ = 0.8 ft
- 10″ = 0.8 ft
- 11″ = 0.9 ft
- 12″ = 1.0 ft
Since the subwoofer can be placed just about anywhere, be sure to decide on subwoofer placement before you enter in the distance for that speaker. If you use the auto-setup feature of your receiver, you’ll find that the subwoofer distance setting is often not representative of where the subwoofer is in the room. It could be listed as so far away that it is in a different room or different home! That’s because the “distance” is really a delay. The delay for the speakers is because of their physical location in the room. The subwoofer distance is more about how the bass reflects around the room.
As you cannot determine the proper delay or distance setting for the subwoofer with an SPL meter alone (it requires a microphone and a computer at the least), go ahead and put the actual distance from the main seat plus 7 feet. If you’ve set your crossover to 80Hz (as is recommended by just about everyone), then this represents one-half of an 80Hz wavelength. While this is not a panacea, and we’d much prefer to be more accurate, this is a good place to start.

Setting Speaker Levels
Next, you’ll need to set the actual output levels for each speaker, including your 5 or 7 main channels, your 2, 4, or 6 Atmos channels, as well as your subwoofer(s). Your measurement device for this task is an SPL meter. You can pick these up from many local or online retailers for under $30. This tool simply measures the loudness of the test tone coming from the active speaker. Your AV receiver will issue the tone, one speaker at a time until you are able to set each speaker’s level properly.
To get started you’ll often have to first enable the AV receiver’s test tone. Then, when you go through each speaker to set the level, the test tone will issue pink noise so that you can raise or lower the settings as needed. I prefer to calibrate each speaker to 75 dB SPL—that’s pretty much a standard, and it’s plenty loud and gets you enough volume to exceed any ambient noise in the room.
To calibrate dual subs, follow our guide above, or check out our article on how to properly EQ two subwoofers. This will walk you through the process of using your receiver’s automatic setup. The same process can be used with a handheld SPL meter.
Sit in the Prime Location
In terms of process and technique, we recommend sitting in your prime listening position and hold the SPL meter in your hand. Orient it such that the microphone is pointing straight up at the ceiling as opposed to pointing at each speaker as you go around the room. The idea is to get each speaker to measure 75 dB SPL. Since the left and right speakers should form the foundation for your level-setting procedure, the first thing you want to do is raise the master volume of the AV receiver until the Left speaker measures 75 dB SPL on your meter.
The only exception is when you do that and your right speaker them measures louder—perhaps due to its placement in the room. If that happens then use the louder speaker as the baseline for your levels. Once this is done, you’re ready to begin setting the other speakers.
Most AV receivers will automatically run through each speaker in sequence. When the pink noise is outputting from the speaker, you raise or lower the output level in the setup menu until the speaker is measuring 75 dB SPL on your SPL meter. Go around the room a couple of times with each speaker until they are all consistent.
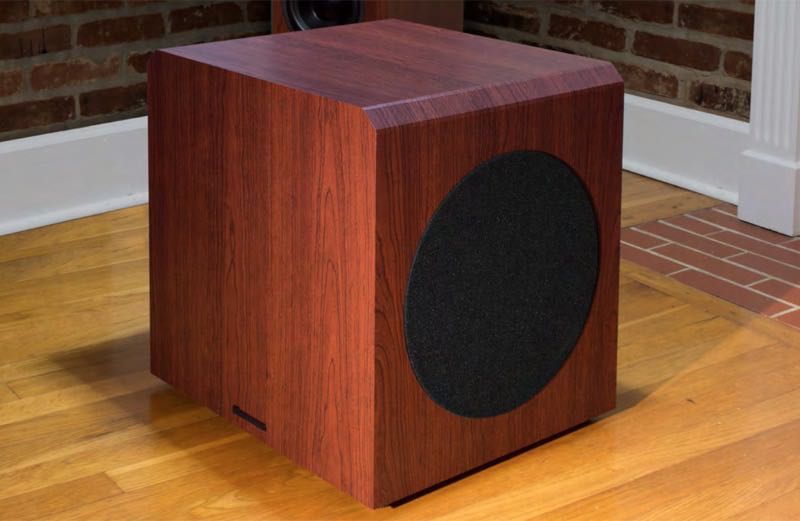
Subwoofer Level Calibration
Assuming you already set up the best location for your subwoofer, the level can really be set to taste. An SPL meter and your AV receiver’s pink noise can work OK, but we’ve often found that it’s a bit off. In either case, I tend to default to setting the subwoofer to around 78 dB SPL. I tend to like a bit more bass, and that extra 3dB seems to do it for me in most cases.
One More Consideration—The Center Channel
The last thing to mention is the center channel. Some people have a problem understanding dialogue in films. Often this is due to the acoustical properties of their room, but setting the center channel a few dB SPL hotter than the standard 75 dB may help with intelligibility.
Conclusion
Setting your speaker levels isn’t meant to be something that constrains you, rather, it’s a tool to help you ensure your system is set up the way you want it. Want your surrounds louder for a more impactful surround sound experience? Bump them up. But using these tools means that you have a baseline that you know is essentially “correct” as far as the experts are concerned. You can then adjust to taste. It’s your home theater! It should sound good to you! Enjoy!


Pingback: Maximize Your Home Theater System With These Easy Stepsartlies | artlies
Sound moves at 340 meters per second. Speaker distance settings to the tenth of a foot is unimportant. You’ll never hear a delay. Speaker perceived volume with speakers that are not placed equidistant on the other hand, is significant. If you don’t want to go out and buy a SPL meter, you should be able to adjust to your taste without too much trouble by understanding 3db is the smallest perceived change in volume you can hear. If one speaker is further away, decrease the other a small amount. In general, always reduce gain when possible.
“3db is the smallest perceived change in volume you can hear”
That is incorrect. 1 db is supposed to be the smallest you can hear. I can notice 1/2 db though. 3 db is what you get from doubling amplifier power. A 10 fold increase in power (ie 10 to 100 watts) gets you a 10 db difference. 3db is very easy to hear.
Hi there!
Do i need to set my surrounds also at 75db
on my AV receiver volume do I turn it up til I get 75db or do I turn up my speaker level to get 75db?
Turn up the AV receiver volume to start at 75dB.
Hey there,
I sit on the center hall and set the distance of each speakers but what I don’t understand is in order to set the preferred 75DB, should the volume level be low or in full? Thanks!
Set the AV receiver volume so that the left speaker is at 75dB during the test tone when the on-screen Adjustment Level is set to 0—then go from there.
My volume control doesn’t do anything while I’m outputting the test tones, so I do I “start” at 75db?
sorry I dont understand. I dont know How to start The db also changes when I change the volume without changing the db calibration.
I want to install music system in community park. Can I use wireless speakers to be fixed on 12 pillars in park covering 1000 sq.ft. area.