Testing Your Home Theater Subwoofer – Is It Working?
Diagnosing problems in your home theater can be frustrating. It isn’t that you can’t tell something is wrong, it is that you don’t really know what part of the signal chain is the issue. Take your subwoofer for example. If you think it is having a problem, is it the sub, the receiver, the source, or some combination? How can you tell? We walk you through testing your home theater subwoofer to get it working again.
Equipment
Before we start, you are going to need a couple of things. First, you are going to need a cable. Specifically, you will need a 3.5mm to mono RCA cable (like this one from Amazon). This will allow you to bypass all the other equipment in your system If you have a newer phone, you may also need a dongle. Fortunately, these aren’t expensive pieces of equipment. You may also need a backup subwoofer cable.
Second, you’ll need access to a bass sweep. You can download a sweep from Audiocheck.net for free. Or you can go to YouTube and just stream something. It doesn’t matter. We aren’t looking for the highest fidelity sweep here. We just need something to put your subwoofer through its paces. The Audiocheck.net sweep might be a little easier on you as, once you download it, you can play it on repeat. YouTube will take a little more manipulation on your part.
Author’s Note: Before you start, listen to the sweep with some headphones. If you’ve never heard a sweep before, you’ll want to know how it should sound. Next, you’ll need to adjust the volume on your phone up as loud as it can go. Leave it there. That way, you know your phone is not limiting the volume.
Step 1: Testing that Your Home Theater Subwoofer is Working
Plug your phone into the LFE input on your subwoofer. Adjust your subwoofer volume down until you are sure you won’t damage anything (either it or your ears). Make sure to mark or remember the original volume knob position so you can return it there after you are done. Play the sweep a few times and adjust the volume on the subwoofer until it is as loud as you can take (if you want to measure with an SPL meter, no louder than 75dB).
If you don’t hear any sound, place your hand on the subwoofer driver or surround. If it is moving, it is working. Adjust the volume up. If you still can’t hear anything, look at the crossover control on the subwoofer. It should be set to “defeat,” “LFE,” or adjusted up as high as it can go. If it is set very low, you may have a hard time hearing it no matter the volume.
The possible causes for your home theater subwoofer not working during this test are volume too low, crossover too low, no power, or broken subwoofer. If the problem is any but the last one, reconnect your sub to your receiver and re-run your room correction. Is your problem fixed? If not, read on.
No Power
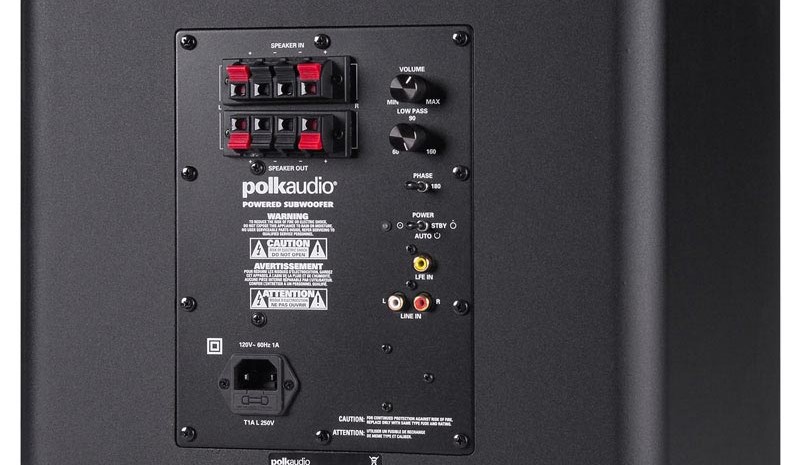
If the problem is a lack of power, there are a few things you can test. First, is there a switch? Is it in the “On” position? We assume so. Next, you’ll want to look for a fuse. In the above image, it is behind the plastic cover just below the power cord. Check for a blown fuse and replace if necessary. Lastly, swap out the power cable for another one. The power cable will either be two- or three-pronged and are almost all universal. If you have an AV receiver, PC, or another piece of gear with a removable power cord that fits, you can use it. If none of those fix your issue, call your manufacturer and start shopping.
Step 2: Testing Your Receiver
At this point, we’ve verified that your subwoofer will make noise. That’s great! You don’t need a new subwoofer! But we still need to find the problem. Return the subwoofer volume to its original settings if you have changed it and reconnect the cable from your receiver. Also, if you have changed the subwoofer crossover, leave it in the new setting. The next step to get your home theater subwoofer working again is to test to ensure that the AV receiver is sending a signal to the sub.
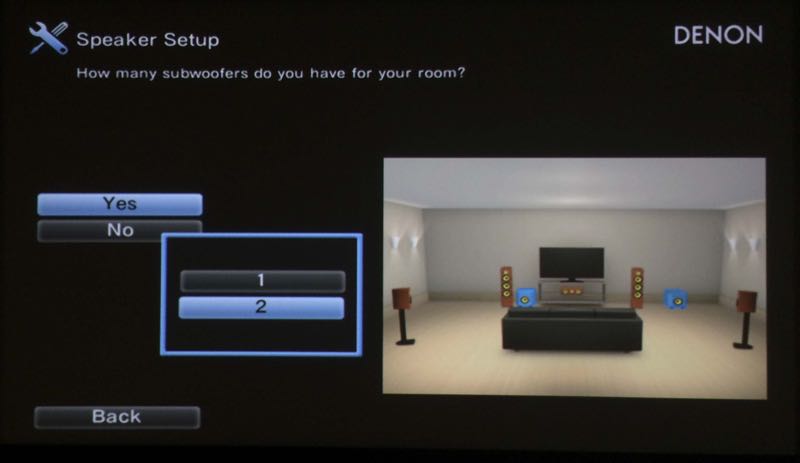
First, you’ll want to adjust the volume of your AV receiver to 0dB. This will make sure that your AV receiver is putting out a test tone that is of sufficient volume. Next, go into the speaker settings and look for manual setup. This will allow you to send a test tone from your AV receiver to your subwoofer. No, this will not override your room correction settings. Play the test tone through your subwoofer. If you can hear it (it should be loud), your subwoofer is receiving a signal from your receiver.
Possible causes for problems here are subwoofer set to “none” at the AV receiver, damaged or defective subwoofer output, or defective subwoofer cable. The one thing you’ll want to eliminate is the subwoofer cable. Swap it out with another one and see if you can hear the test tone. If not, there is something wrong with your AV receiver. Contact your manufacturer and see if they can give you any other advice. And, of course, start shopping. If this test reveals the problem and you fix it, reconnect your sub to your receiver and re-run your room correction. Is your problem fixed? If not, read on.
Step 3: Test with Each Source
If you have verified that the subwoofer itself works and that the receiver can send a signal to the subwoofer, then your problem is in the settings somewhere. If you have engaged stereo or Pure Direct, your AV receiver may disable bass management. Bass management sends the bass from any speaker set to “Small” to your subwoofer. If you have your left and right speakers set to “Large” and are playing in stereo mode, your subwoofer won’t get any bass. Make sure your speakers are all set to “Small.” Yes, even your tower speakers.
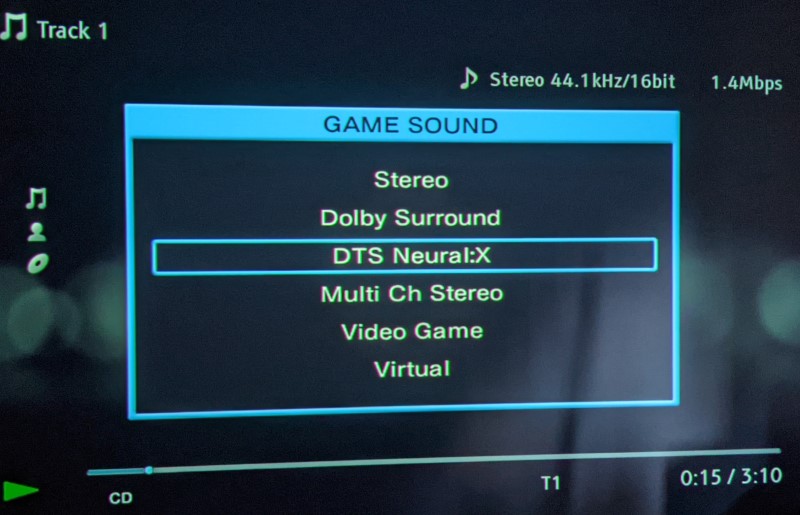
The problem is that many AV receivers have defaults for audio. If you want your AV receiver to upmix all (or some) of your audio to utilize all your speakers, you have to tell it that. And you can’t just tell it once. You need to change the settings for every input and audio codec. Yes, it’s annoying but you only have to do it once for each inputs and codec.
Also, note that some AV receivers have separate bass management settings for stereo specifically. If you like to listen to stereo without any upmixing, you’ll need to find these settings and make sure your subwoofers are active (if that is what you want) and your speakers are set to small. Chances are, if you are still having problems with your subwoofer not playing at this point, then it is the settings on the AV receiver.
Step 4: Watch a Movie
If you’ve tested that your home theater subwoofer is working with all the above, it is time to watch some content. If you still feel like your subwoofer is not working, then your problem isn’t the subwoofer, it is your room acoustics. To test this, run that bass sweep through your system or subwoofer. The volume should be even (might seem to get a little louder at the higher frequencies). If you notice it cutting out, that is the room creating bass nulls. Your room can also create too much bass. The solution for both is the same. Check out our article for solutions.
Wrap Up
Things break. That’s just a fact of life. Our guide will help you identify if, in fact, your subwoofer has somehow failed. But, many times people complain about their subwoofers when the subwoofer really isn’t the issue. It could be the settings, a bad cable, or even a blown fuse. If it seems like your subwoofer isn’t working, our walkthrough should help you identify and fix most if not all of the common problems.
