Ultimate REW Tutorial: Taking Measurements
Room EQ Wizard (better known in the AV community as REW) is a powerful tool. It can analyze the speakers in your room and help you make adjustments using a miniDSP. But, like all tools, it is only as powerful as the one that wields it. That has historically been the problem. REW is powerful, but it is also confusing. There are lots of guides and tutorials out there. You should check them all out. But we’ve gone through and made what we believe to be the Ultimate REW tutorial. In part one of our ultimate step-by-step tutorial, we will guide you through taking measurements using REW.
What You Need
There are three things you need before you start.
- REW
- UMIK-1
- Computer (Mac or PC will work) with a way to output HDMI
First, there are some things you need to do. Of course, you need to download REW. We highly recommend using the full download version from www.RoomEQWizard.com. Do NOT download the beta version. The beta version tends to have ASIO4ALL driver issues. You’ll also need the ASIO4ALL drivers available at www.ASIO4ALL.org. Again, do not download the beta versions. You’ll want the full release.

If you haven’t yet, go out and buy a UMIK-1. This is a measurement microphone that is used by many. So much so, that the known inaccuracies of the mic can be corrected by REW. Just head over to www.minidsp.com. You’ll need the serial number of your mic. Enter it into the website and they’ll provide you with a calibration file.
Better yet, head over to Cross-Spectrum Labs. There you can buy a UMIK-1 with a calibration file that is unique to your microphone. The difference? The calibration file you get from miniDSP will correct for your batch of mics in general. At Cross-Spectrum Labs, they take each mic and compare it to their professional mics. They create a unique file that ensures that your specific mic is as accurate as possible. The mic costs a little more, but you know you are getting the best product.
Getting Started
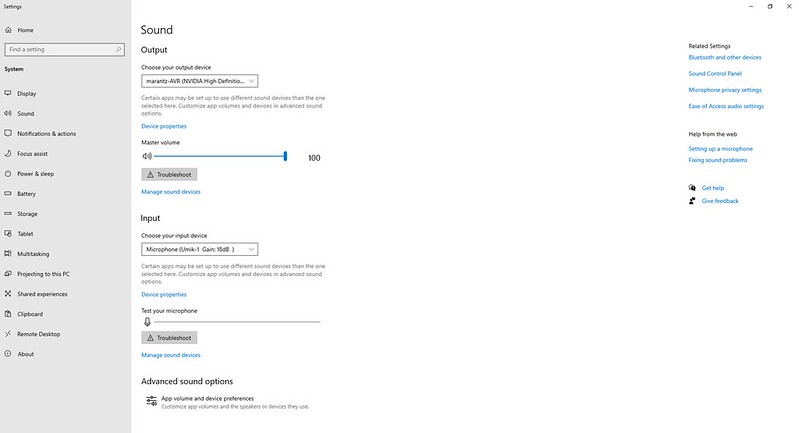
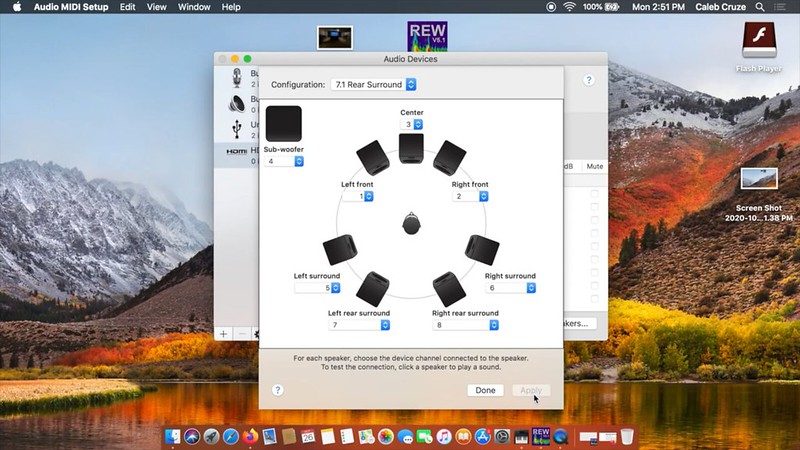
There is a reason our ultimate REW tutorial uses the UMIK-1 for taking measurements. The UMIK-1 is plug-and-play on both Macs and PCs. You shouldn’t need to adjust its gain. You’ll want to make sure you are outputting 7.1 through the HDMI (or DisplayPort) port and that the HDMI cable from the computer to your AV Receiver is connected. The output volume should be at maximum. Also, you’ll need the HD1 plugin for the miniDSP 2×4 HD (if you plan on using one). The plugin is free with purchase but make sure you create an account first.
When you load up REW for the first time, it will recognize the UMIK-1. It will then prompt you to load a correction file. If you got the one from miniDSP, load that. If you got one from Cross-Spectrum Labs, load that one. You can skip this step and load it later by clicking on the Preferences in the upper right. You’ll select Mic/Meter and make sure your input type is Mic. If you are using the one from Cross-Spectrum Labs, you’ll have a number of correction files to choose. Select the 90-degree file.
Author’s Note: Remember that the listening mode of your AVR is tremendously important. You want to be thoughtful about whether you have bass management on or off. Are you trying to get your subs dialed in before or after you run your room correction? Make sure you know how your receiver is set before you start. If you don’t, if you go back to do more measurements later, you won’t know if the differences are because of the AV receiver’s settings or not.
Loading the ASIO Files
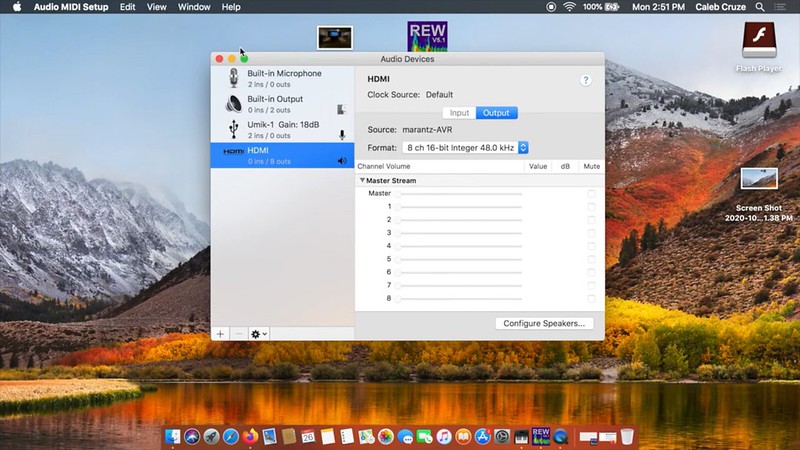
If you have a Mac, you just need to select the correct speaker you want to test as your output and make sure the UMIK-1 is selected as the input.
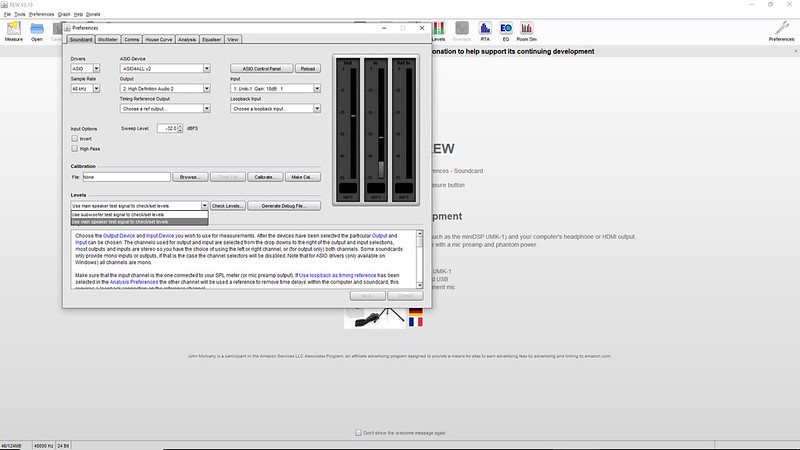
For Windows, it is a little more complicated. You’ll need to change the driver to ASIO and then choose ASIO4ALL. It’ll ask if you want to continue to use the microphone correction file. Say Yes. Immediately hit the Reload button and then open the ASIO Control Panel. You need to make sure your HDMI output device and your UMIK-1 are active and that your stereo analogue output is NOT. It might take them back and forth of closing, reloading, and opening the ASIO Control Panel to make everything stick. Now, you can select which channel you want to output, ensuring the input is set to the UMIK-1.
Setting Up Sweeps
Double-check that your computer volume is a max. Double check that your HDMI cable is run to your receiver. Select the correct input on the receiver and turn the volume level up to 0dB. This is reference level. Now, hit the “Measurement” button on the top left. This will bring up the sweep menu.
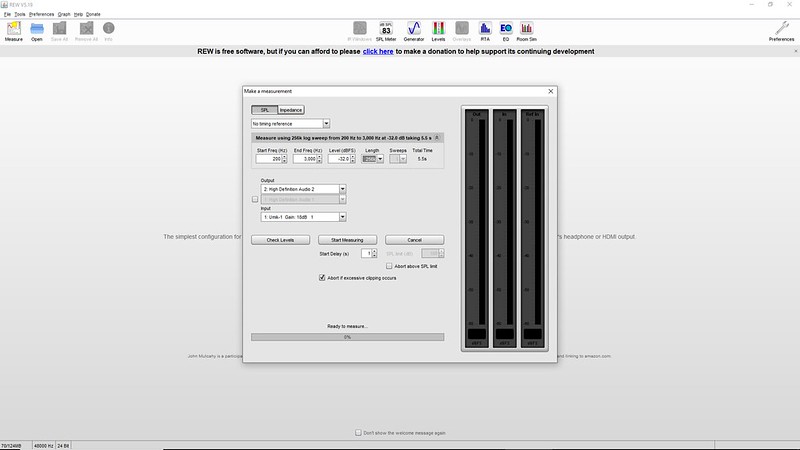
A 0dBFS Sweep from REW will output between 106.3 and 106.6 dB. That is, what we call in the business, crazy loud. So, lower the volume in REW. You can do that by lowering the sweep level (see the above picture). If you lower it to -22dB, you’ll get about an 85dB sweep. -32dB (as in the pic above), will get you a more tolerable 75dB sweep. You’ll need to pick the start and stop points. In the above pic, we were measuring the output of a small speaker. If you are measuring a subwoofer, your sweep will start much lower and end around 200Hz
Setting Up the Microphone
We have a whole article on how to set up a measurement microphone for use with room correction programs. Check it out but, in short, your mic should be pointed straight up at about ear height. It should be clear of any surface by at least twelve inches. If you plan on taking multiple measurements in your room to ensure even bass across all your seats, follow our placement guidelines for the other positions in our article. Also, try to position your body and computer somewhere out of the way during the sweeps. If you can leave the room, all the better.
Running Your First Sweep
Chick the “Start Measuring” on the sweep screen. After it is done, you’ll have a graph on your screen. We highly recommend relabeling it in the upper left of the interface immediately. If you don’t, you risk overwriting your data later.
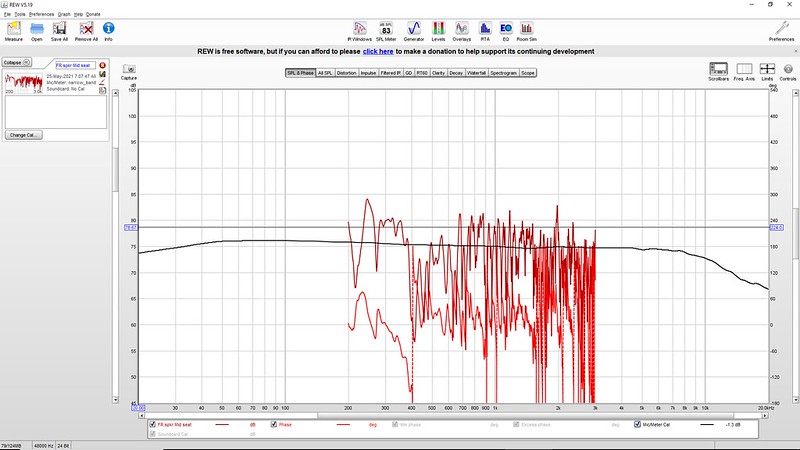
The initial SPL & Phase tab might look confusing. You can use the check boxes at the bottom to look at just the frequency response. Or better yet, just click the All SPL Tab.

As you take more measurements, they’ll be overlaid. They’ll be different colors. Don’t forget to rename each as you take them. This is make things much less confusing later.
Add Smoothing
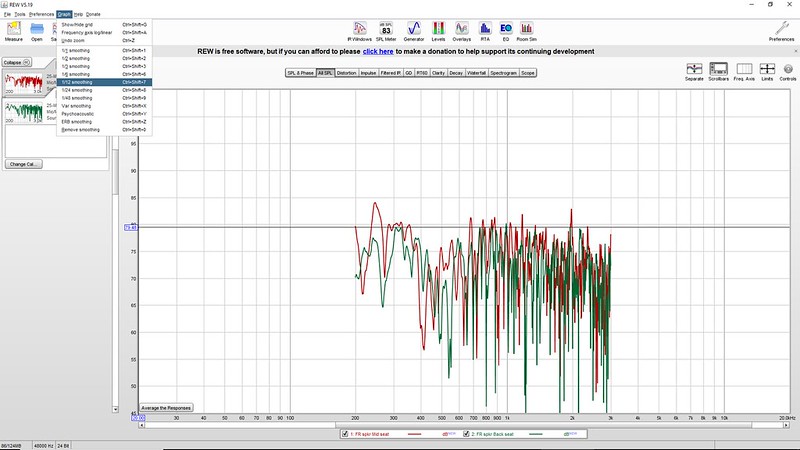
As a beginner in REW, the raw graphs look pretty scary. Don’t worry. This is the ultimate REW tutorial and we are not going to stop at just taking the measurements. You’ve heard that the target response should be flat. That’s a line from left to right. Your line is all over the place. Don’t worry. Yes, the graph is all over the place now, but once we apply some smoothing, it will look better (hopefully) and will more accurately represent what you actually hear in the room.
Under the Graph menu (top left of the screen), select the 1/12th octave smoothing. This will mellow out the graph and make it a little easier to look at.
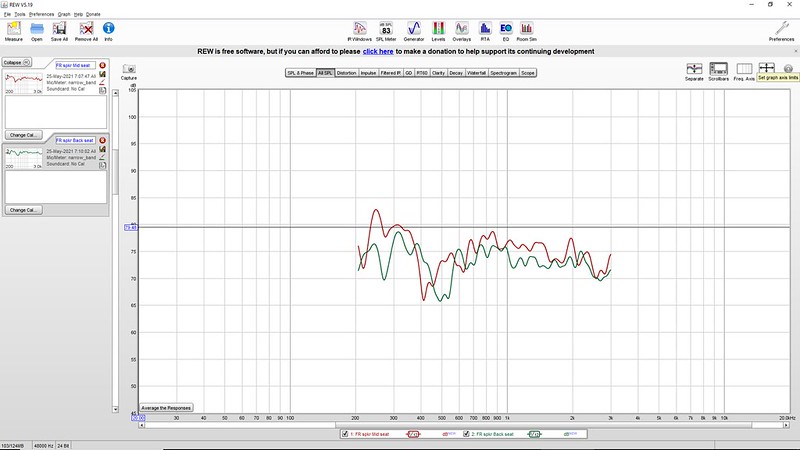
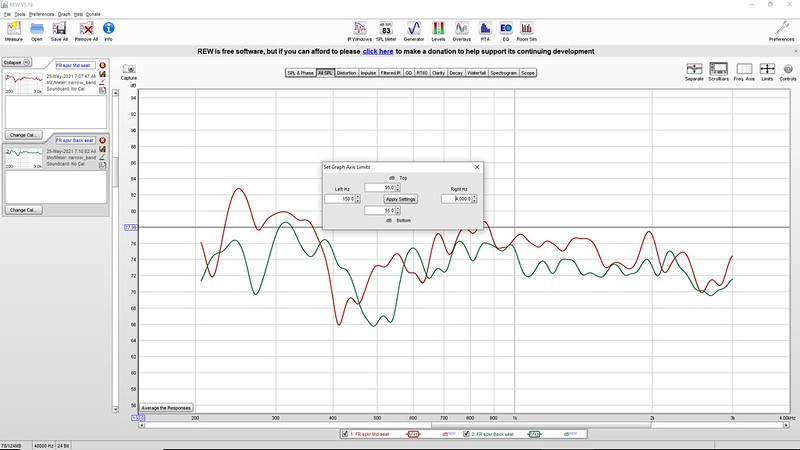
Changing the Graph Range
On the top right of the graph, you’ll see a “Limits” button. Press it and you can set the axis to whatever you want. This will make the graph bigger and easier to read. It will also eliminate any negative space. Click “Capture” if you want to save a jpg of your graph.
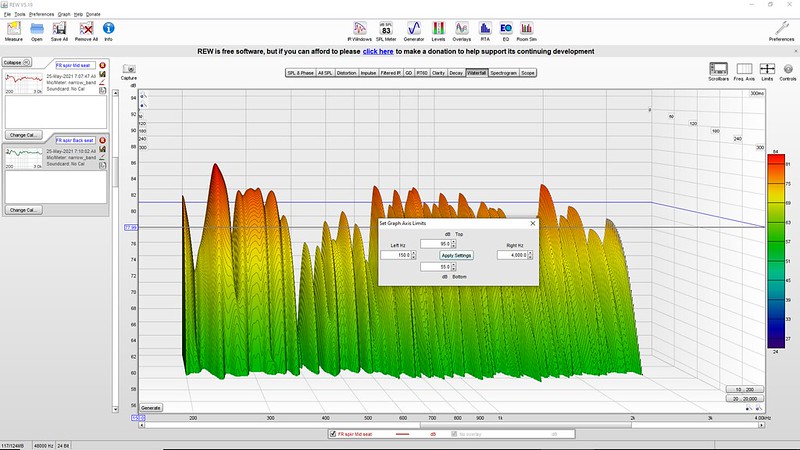
Waterfall Graphs
We’re not done with graphs yet! If you click the “Waterfall” tab you see that it is blank. Click the Generate button on the lower left, adjust your Limits again, and Bob’s your Uncle! You have a waterfall graph. You can press the “Control” button on the upper right to adjust the time for the Z-axis.
Conclusion
There you have it! Our ultimate REW tutorial focusing on taking measurements. You have the frequency response for your speaker and its waterfall graph! Now, you just need to do that for every speaker at that same seat. And if you want to test multiple seats, you need to do that same thing for all the seats and all the speakers. If you have a 5.1 system and you want to test all your speakers at say four positions, you’d need to run a sweep 24 times (once for each of your five speakers and one subwoofer at each seat). Yes, that’s a lot of measurements.
So that’s frequency response and waterfall graphs. We ultimately want the frequency response of each individual speaker, or all of our subwoofers combined, to match our target curve. And we want nice, even decay times across all frequencies in our waterfall graphs, with relatively short and steep decay times.
But what do you do with these graphs? Well, one of two things could happen at this point. You may look at the graphs and say, “Yep, looks good,” or “Oh no, we’ve got to do something about that.” If it is the latter, we recommend you head over to our friends at AV Nirvana or Home Theater Gurus (YouTube Link). The latter is a very long and detailed video on how to use REW and a miniDSP to calibrate your home theater. Enjoy!
Special thanks to Rob H. of the AV Rant Podcast for making this tutorial possible!

Thank you SO much mate for this tutorial its such a HUGE Help !
Cheers Ned
Hello, great write up. My issue with it is the inablility to enlarge the pictures. Making them larger with the zoom doesn’t really help either. I am using a 2015 MBP 15″.
Is there any chance those can be updated to be able to enlarge images?
You should be able to click on the images now.
I am looking for a book or online guide of any sort that tells how to read all of the measurements and what you can do with them. There is no book, so what would be a good site to look up?
The links at the bottom of the article are the best resources we know of for more detailed information about REW.