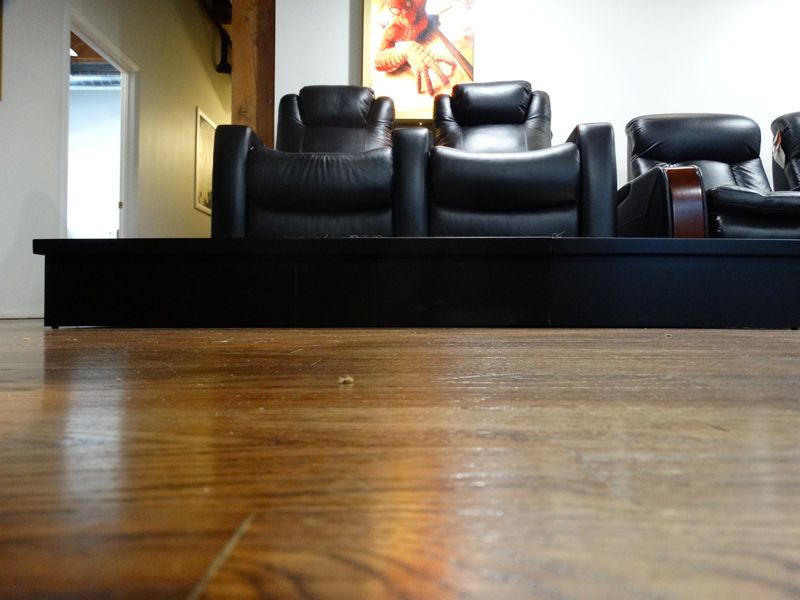
Three Tips to Add a Riser to Your Home Theater
If you want to add a riser to your home theater, there are a lot of things to consider, a lot of pitfalls to avoid. While there are many articles that tell you HOW to build a riser, we wanted to take you through some of the reasons why you’d want to build a riser one way versus another.
Adding a Riser to Your Home Theater: Why?
There are real reasons for wanting to add a riser to your home theater. The most common is that you want a second row of seats and you want everyone to be able to see the screen. There are different ways of doing that. You can buy prefab risers or seating with risers built-in, you can add bed risers to the bottom of the back couch (seems dangerous to us, but we’ve known people that have done it successfully), or you can build your own.
How to Do a Riser Right

Prefab risers are expensive, bed risers are terrifying, and DIY risers require a bit of skill and planning. Don’t have those? Definitely look into hiring a handyman (or plying your handy friend with beers). There are a few things you are going to really watch out for/plan for when you add a riser to your home theater:
- Do you want the riser permanently attached to your floor or removable?
- Do you want the riser to shake or do you want it to be inert?
- How high does your riser need to be?
Attached or Removable
Planning for the future isn’t always fun and it isn’t always cheap. In the case of adding a riser, it is imperative. Do you want to have this riser attached to the ground? What will that do to your house resale value? If you make it removable, do you drop it on top of the carpet or carpet around it? Either way, you have a crushed section of carpet that will likely never recover and will be a different color, or you have a hole.
Our Tip: When you add a riser to your home theater, we recommend that you carpet the room as normal and then place the riser on top. Yes, there can be issues years later when you remove the riser with the carpet underneath, but it is cheaper to replace the carpet in a room than to rip out the riser and have to repair the floor. Plus, when you are living in the room, if you decide to change the layout for any reason, you aren’t stuck with a riser bolted to the floor.
Shake vs. Inert
There are two schools of thought on riser construction. You can make them fairly hollow or you can make them extremely inert. If you asked a handyman or friend to build you a riser, they would likely construct something that we would classify as “hollow.” It would have a top, some sort of 2×4 construction underneath, and maybe sides. The problem with this sort of design is the that riser isn’t heavy enough to withstand the bass it is about to experience.

Every structure has a resonant frequency. This is the frequency (or frequencies) where the structure will vibrate when subjected to sound waves. If you add a riser to your home theater that is fairly hollow, that resonant frequency will be within the audible range. Yes, we know you are putting a heavy couch on it. Yes, we know your fat uncle will be sitting on it. It doesn’t matter. That riser will shake and, when it does, it will vibrate the couch. You might like this, we find it annoying.
Our Tip: The solution is to overbuild the riser. Don’t use 24″ on center studs, use 18″ or even 12″ on center. Put more screws into the thing than you think you need. Add two pieces of plywood to the top. Anything to add mass and bracing. And consider filling the riser with something to make it even more inert. You’ll see people suggest dry play sand, kitty litter, or concrete. The idea is to make the riser heavier so that it is less likely to vibrate. We would steer you away from those that suggest using the riser as a “bass trap.” This entails drilling holes in the side and adding insulation to the interior of the riser. This is basically asking for vibrations in your riser.
Height of your Home Theater Riser
There are guidelines for how high steps should be and recommendations for how high risers should be. You can follow them. But we recommend caution. Those suggestions are either based on best building practices or assumptions about your room and seating. While we would always recommend following best building practices, this is your home. You have complete control over how things are built and why.

Our Tip: Take a close look at your home theater and your planned seating. If you don’t need a 12″ riser, you don’t need to build one just because that is the industry standard. If your ceilings are lower than average (as they often are in basement home theaters), then you might not have the room for a 12″ riser. You may need 8″ or even smaller. You’ll need to take a look at the sightlines in your theater and the dimensions of your seating and room to make the best decision.
In the end, if you follow our tips, you should find yourself with the perfect riser for your home theater.


