Outdoor Audio Wiring for Speakers
I’ve seen a lot of outdoor audio wiring for speakers where the audio wiring is what I’d call…well, I’d just call it sloppy. Leave a pair of speaker cables out in the room and, after while, you’ll likely see a ton of oxidation. Take that same cable and place it outside in the weather. Now you’ve got an even greater potential for signal degradation or failure. Then factor in snow and rain. You get the idea. One thing we try to recommend is at least making sure to not simply expose your cables to the elements. You can do a number of things to protect them. This ensures you don’t see a drop-off in frequency response or even complete signal loss.
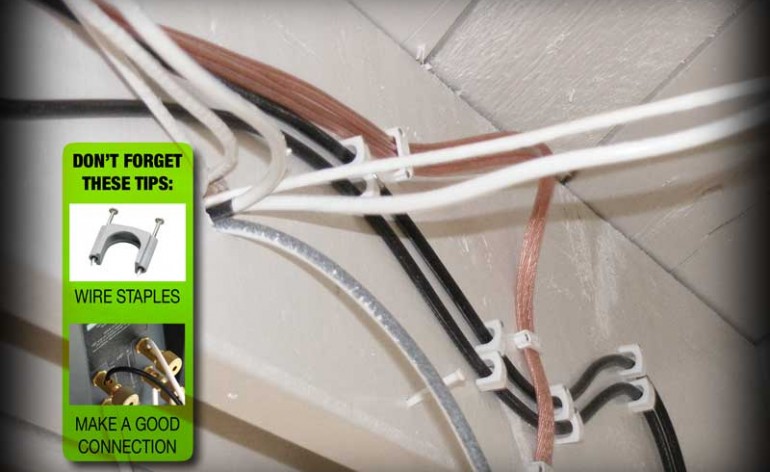
Staple Those Cables
If you run outdoor audio wiring for speakers from an inside location to a backyard, chances are you’re going to need to run them through an attic or crawlspace. When you do, be sure to staple the speaker wiring in place. You want to protect it from either contact with curious critters (in the attic) or from coming in contact with the ground or water (crawl space).
I can’t tell you how many times I’ve seen people run outdoor wiring from an equipment closet to an outside space. Often, the cabling hangs loose, lying right on the ground. Eventually, the signal degrades or an entire channel drops out. It doesn’t take much contemplation to figure on why that might have happened.
Bare Cable is Fine for Outdoor Audio Wiring But No Exposed Wire!
I also see a lot of people who strip their cables too far. This leaves lots of oxidized wire visible and susceptible to the elements. It’s a bit like baiting fish. If You encourage oxidation in one place, you’re more likely to see it spread more quickly. For those using bare wire connections on outdoor speakers, here are a few tips:
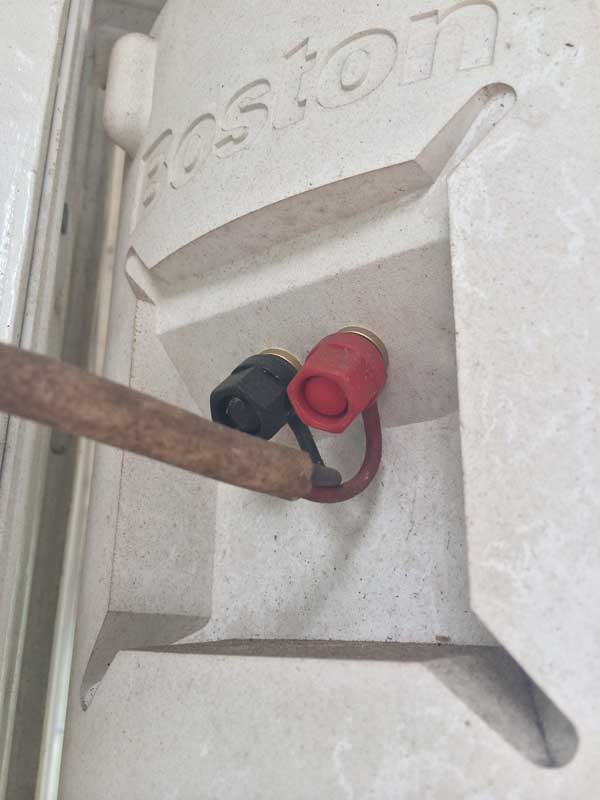
- If you are using bare wire for spring clip connections, that’s fine. Make sure, however, to only strip enough wire to allow the jacket to fit snugly up against the spring clip.
- If you have an option to use a banana connector, it may be best to do so. This eliminates wire that would otherwise be exposed.
- It’s not a ridiculous idea to wrap the ends of your cable in electrical tape. You can even wrap the termination itself. This further insulates it against the weather. I even had a friend that dropped some paragon wax on his outdoor speakers’ terminals after they were connected to coat the wire. That may be a tad overkill, but you get the idea.
Using Banana Connectors Helps Only If You Don’t Over-Strip
For outdoor speakers that offer a pair of five-way binding posts, you may opt to use a banana-style connector. If you do, don’t neglect the above tips. You still want to eliminate any exposed copper in outdoor audio wiring, so don’t over-strip the jacket. We love how banana jacks tend to seal a signal path from the elements. The wire stays clamped securely to the connector, and the connector is buried fully within the binding post.
Use Conduit for Burying Wire
One final tip for outdoor audio wiring has to do with speakers that are located in areas away from the home. Perhaps you have a disconnected shed, or you’re wiring up something in a separated outdoor kitchen. Maybe you’re using one of those cool buried-in-the-ground subwoofers. Regardless of the reason, if you need to bury cable you’re going to want to go with gray non-metallic PVC. Not only can it seal your cable away from the elements and prevent rodents from gnawing on your speaker wire, a 10-foot piece of 3/4-inch diameter PVC will likely cost you less than $2. It’s a very inexpensive way to ensure you don’t have to re-do all that hard work in a few years.
Check with your local codes (as with the suggestions above) to see how deep you need to bury it. A lot of those rules are in place for safety, but even with low-voltage wiring, it’s nice to know you’re not going to clip the wire with your edger. The reason we tell you all of this is because we love putting speakers outside—we just love it! It’s a great way to expand your audioverse to yet another place where you can enjoy your tunes. Doing the job correctly and following a few guidelines can be the difference between an experience you love, and one you curse about a few years down the road!


