
Using Existing Speakers in Your New House
Being an AV enthusiast/writer, I always read AV forums or listen to podcasts like AV Rant to learn more about AV and home theater. If you read any of my stuff, you will quickly notice that I tend to write articles aimed at novice AV enthusiasts looking for help getting their first setup or looking for a common-sense approach to spending your hard-earned money. One of the more common posts I see are from homeowners who have purchased a new house, and the previous owners have installed whole-house audio. Or there is an unfamiliar wall-plate with many equally unfamiliar plugs, and you need to know how to hook it all up. Using existing speakers in a new house can be daunting. Well, if that describes you, read on and let’s arm you with knowledge.
Step One – Figure Out What You Have
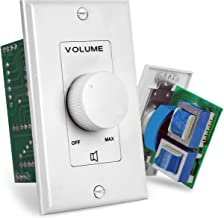
There are two typical scenarios that homeowners will face. The first is that the previous owner has installed whole-house distributed audio. You will typically see a distribution plate and audio controls in the rooms with speakers. The distribution plate can take on many shapes, but it usually will be a wall plate with a 5-way binding post, a screw-in type of panel in which your insert the bare wire and tighten it, or a group of speaker wires dangling somewhere in the house.
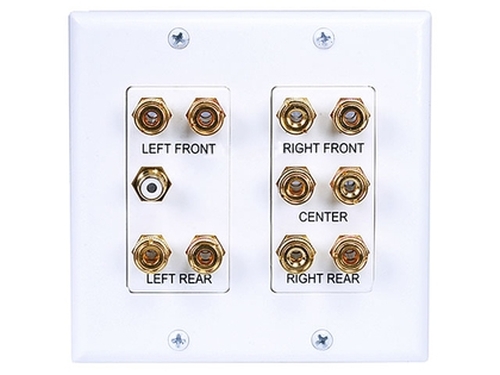
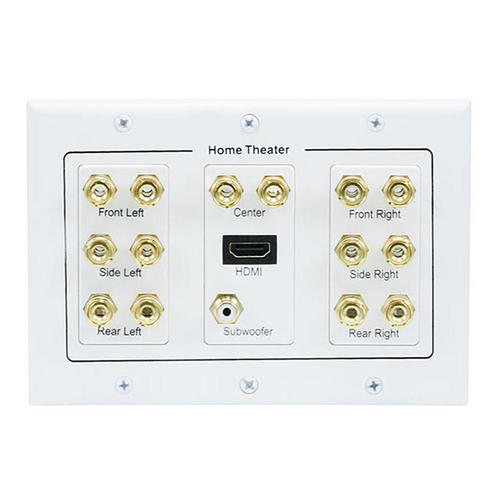
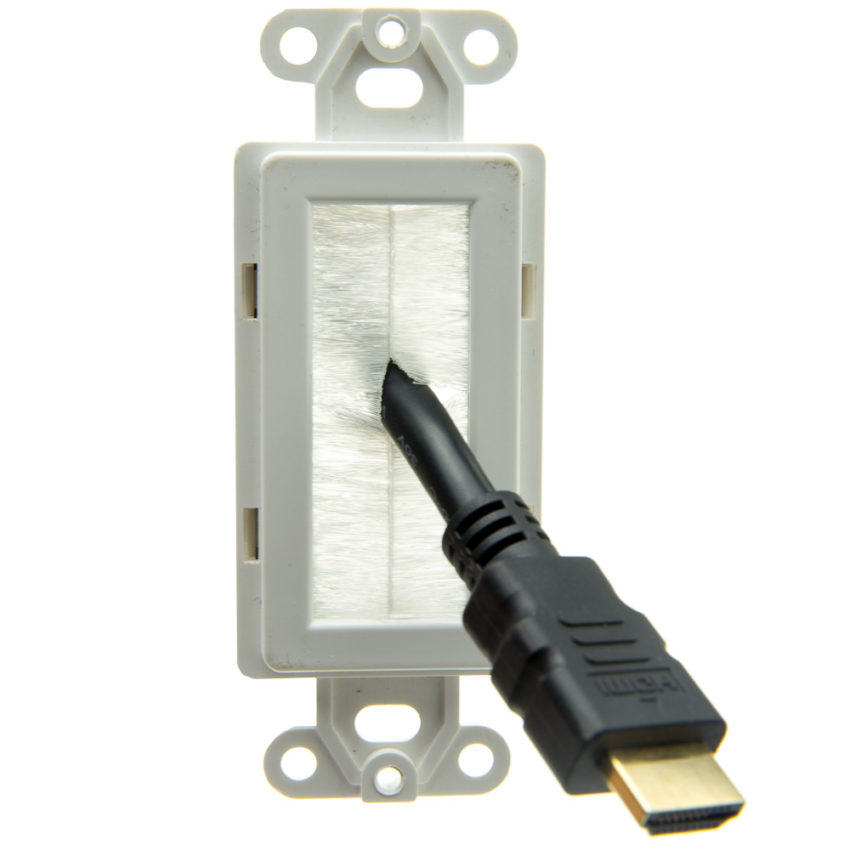
The second likely scenario you will encounter is an in-wall home theater system with a gang-plate or brush pass-through plate and either in-wall speakers or speaker terminal/brush pass-through plates where the speakers would sit. I have a 5.1.4 gang plate in my home theatre, with speaker terminals for my five floor-level speakers and four in-ceiling Atmos speakers.
In either case, it’s essential to identify what type of system you have. Once we have that determined, we can figure out what we need to make it all work!
Step One – Identify The Speakers
So you have a house, a bunch of existing speakers, and you really want to use them. So hopefully, the previous homeowner labeled all of the connections for you. But if they didn’t, there is an easy way to identify and label your speakers. To accomplish this, you will need a small length of speaker wire, a 9v battery, a speaker (if there is not an in-wall one), and something to label the connections. I highly suggest a helper to help run from room to room and listen for a response.
Connect your wire to the distribution/gang plate terminal, with the red wire connected to the positive or red terminal and the black wire connected to the negative or black terminal. In the case of bare wires, you will connect directly to the battery. You then connect the red wire to the positive (small connector) side of the 9v and the black wire to the negative side (large connector). That will send a signal to the speaker and move the cone. Listen in the room for which speaker is moving. Once you have done that, label the connector. Repeat for the remaining speakers and label.
If you already have a surround or stereo receiver, hook up the speaker wires to the terminals, play something through the receiver, and listen for the sound.
Step 2 – Moar Power – Whole House Audio
So now that you have everything labeled, you need to power the speakers and add a source to play media.
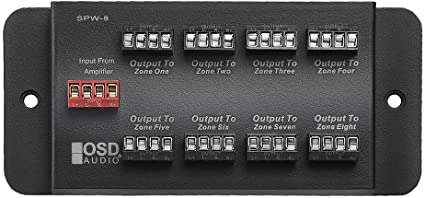
If you are using the whole-house audio as intended, you will need to add a multi-channel amplifier and a source to play media. I have seen amplifiers with as few as two channels, all the way up to 16. It will depend on how many speakers you need to power. As far as a source goes, you are in luck. Many whole-house audio amps have built-in streaming and Bluetooth. So this means that you can very easily stream media from your phone. You can also add a media streamer controlled with your phone or voice assistants. The world is your oyster here. Hook it all up, troubleshoot and enjoy.
Step 2A – Moarer Power – Home Theater
For home theater, it will depend on what configuration you have. For example, if your setup has terminals for left, right, center, right and left surrounds, and a subwoofer, you have a 5.1 surround setup. But if you start to see speakers or terminals behind you and overhead or on the ceilings, you likely have a 7.1.2 (or .4) surround sound setup. Your configuration will determine the number of channels of amplification you will need. No matter what configuration you have, there are a few things you want to look for in an AVR.
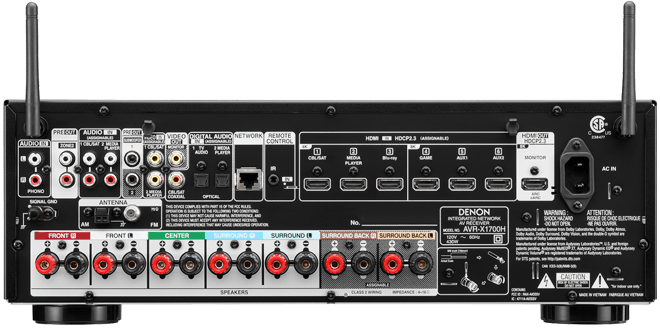
HDMI 2.1 Ports
You may not have any HDMI 2.1 devices, but you might eventually, and there is no sensible reason (unless you get a smoking deal on an older HDMI 2.0 receiver) not to add some future-proofing. Right now, it’s slim picking for AV receivers with multiple HDMI 2.1 inputs. We suggest you look at the Denon AVR-760H, Denon X-1700H, the Onkyo TX-NR5100/NR6100/NR7100 or the Onkyo TX-RZ50 AVR’s. In addition, you will need to match your receiver and your configuration to ensure you have enough channels of amplification (or the ability to add an external amp). The Denon 760H, X1700h and Onkyo NR5100 will only power 7.2 (or 5.2.2) setups, and the Onkyo NR6100/7100, and RZ50 are your options for 7.2.2 or 5.2.4 setups.
Room Correction
Unless you buy something from a decade ago, you will get an AV receiver with room correction built-in. The difference lies in the tier included. The entry-level receivers will only have the most basic EQ built-in, while higher-end models will provide muct better room correction. Onkyo features Dirac Live on their higher-end receivers, while Denon uses Audyssey. So if you can spring for a better tier of Audessy or Dirac, I recommend getting it.
Step 3 – Add Speakers
So you have identified and labeled the ports and/or wires in your walls. You should also have (or have a plan for) how to power your system. If you don’t have existing in-wall or in-ceiling speakers, you will have to add some speakers and a subwoofer (preferably two) to your house. There are a lot of variables that go into choosing a speaker, including the volume of space you need to fill with sound, the distance you are from your speakers, what sounds good to your ear, and aesthetics. I won’t get into an in-depth discussion of what you should choose. You can find that advice here. But generally speaking, most spaces can get away with a solid set of bookshelf’s supported by a center, surrounds, and a couple of subs. But, if you want to add Atmos, you will need to add on-ceiling or in-ceiling speakers or…
Step 4 – Convert Overhead Speakers to Atmos
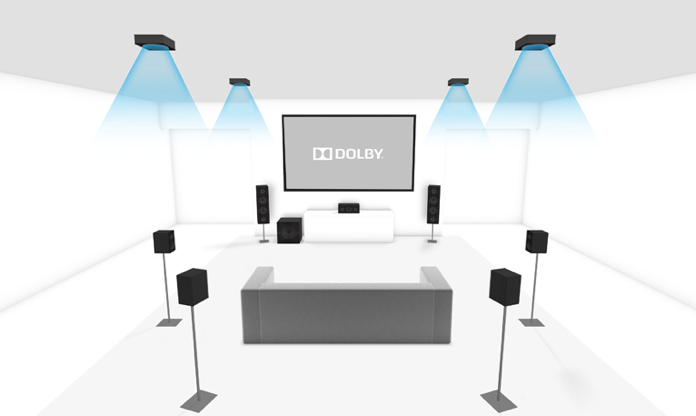
If your home theater is in a room with existing overhead speakers from the whole-house audio, you can convert those to your Atmos speakers! Check out the Dolby diagrams and notice that they include quite a large range of angles for each Atmos location. You should be able to use nearly any overhead speaker in some way, as long as they aren’t too close to each other. Depending on location, you may need to consider moving them, or you could take a chance and leave them where they are and see how well they integrate into your system. You will have to connect the speakers to the AV receiver, so you may need to fish wires yourself or hire an installer to come and do that for you, depending on where they terminate.
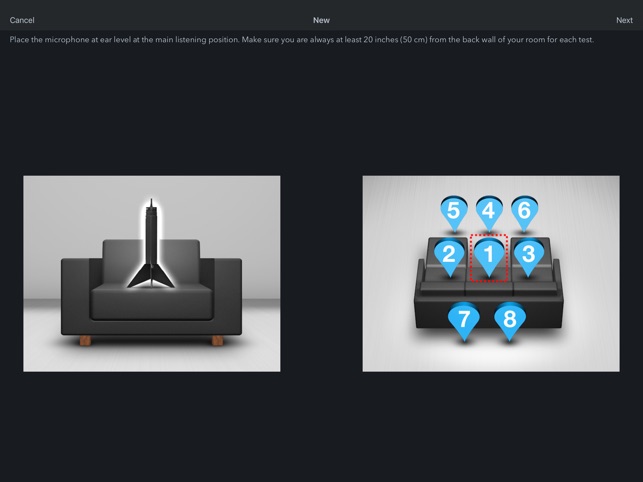
Step 5 – Troubleshoot, Calibrate and Enjoy!
This part is the best step. If you take your time and are methodical, chances are you shouldn’t need to do much troubleshooting. Once you get everything up and running in your HT, hook up your mic and calibrate your system. Then it’s time to sit back and enjoy some media!
Our Take
Buying a new home can be a very overwhelming experience. The same is true if your new house has existing systems that you are unfamiliar with or have never seen. Our advice? Do some research, look through forums, listen to podcasts that cater to AV, and ask questions. If you take it step-by-step, the chances are that it will not be as confusing as it looks. You’ll get those existing speakers in your new house working in no time!
